
The security of my network keeps me up at night. Honestly it does. We live in a world where enterprise networks are defending themselves against state-sponsored attacks. But what do attackers look for? Typically, open, well-known, vulnerabilities.
Well, at least to the hackers, attackers, and even script-kiddies, these vulnerabilities are well-known. Those playing defense are often a step or two behind just identifying vulnerabilities – and often times at the mercy of patch-management cycles or operational constraints that prevent them of addressing (patching) these waiting-to-be-exploited holes in the network.
What can we do about it?
The first thing we can do is to stay informed ! But this alone can be a difficult task with a fleet of various platforms running various software versions at scale. How many flavours of Cisco IOS, IOS-XE, and NXOS platforms make up your enterprise? What version are they running? And most importantly is that version compromised?
The old way might be to get e-mail notifications (hurray more e-mail!), maybe RSS-feeds, or go device-by-device, webpage-by-webpage, looking up the version and if it’s open to attack or not.
Do you see why, now, how an enterprise becomes vulnerable? It’s tedious and time-intensive work. And the moment you are done – the data is stale – what, are you going to wake up every day and review threats like this manually? Assign staff to do this? Just accept the risk and do they best you can trying to patch quarterly ?
Enter: Automation
These types of tasks beg to be solved with automation !
So how can you do it?
Let’s just lay out a high level, human language, defined use-case / wish list.
- Can we, at scale, go get the current IOS / IOS-XE / NXOS software version from a device?
- Then can we send that particular version somewhere to find out if it has been compromised ?
- Can we generate a report from the data above?
Technically the above is all feasible; easy even!
- Yes, we can use Ansible and the Cisco Genie Parser to capture the current software version
- The Cisco Product Security Incident Response Team has incredible, secure, REST APIs available that we can automate with the Ansible URI module
- Using Jinja2 templates we can craft business-ready reports
Getting Started
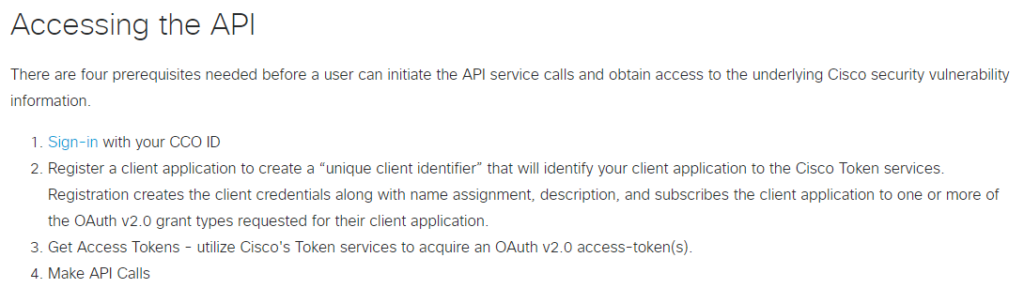
First you need to setup your Cisco.com REST API suite access
Pre-Ansible Development
As with any new REST API I like to start with Postman and then transform working requests into Ansible playbooks.
First, under a new or existing Cisco.com Collection, add a new request called IOS Vulnerabilities
Cisco.com uses OAuth2 authentication mechanism where you first must authenticate against one REST API (https://cloudsso.cisco.com/as/token.oauth2) which provides back authorization Bearer token used to then authenticate and authorize against subsequent Cisco.com APIs
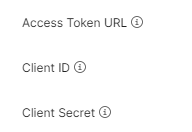
Your Client ID and Secret are found in the API portal after you register the OpenVuln API

Request and use a token from the API in Postman:


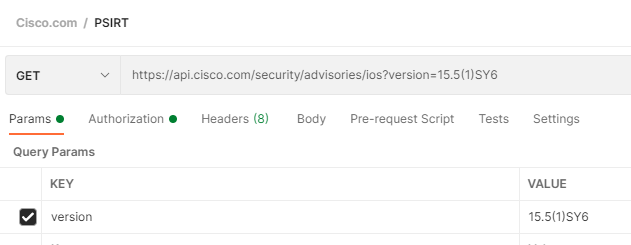
Now add your request for IOS
https://api.cisco.com/security/advisories/ios?version=
Test it out!
Let’s hard code a version and see what flaws it has
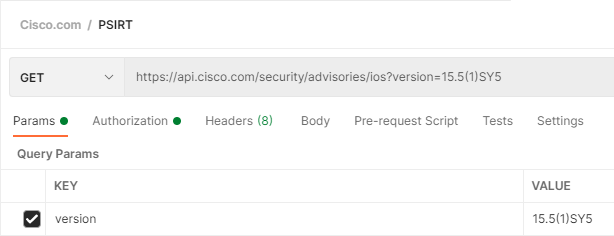
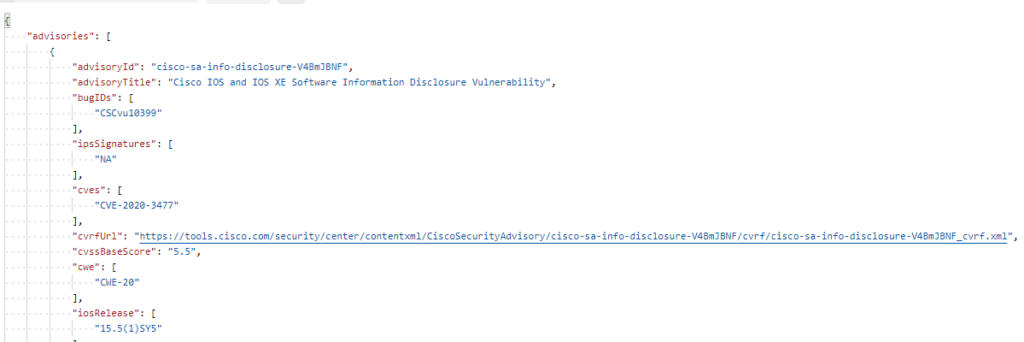
Ok so it has at least 1 open vulnerability!
Does it tell us what version fixes it?
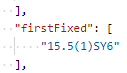
Ok let’s check that version quickly while we are still in Postman

This version has no disclosed vulnerabilities!
One interesting thing of note – and our automation is going to need to handle it – is that if there are no flaws found we get a 404 back from the API not a 200 like our flawed response!

The Playbook
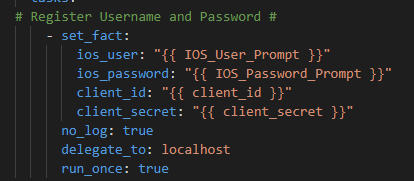
For the sake of the example I am using prompted inputs / response but these variables could easily be hardcoded and Ansible Vaulted.
So first prompt for your Cisco hosts username and password and your Cisco.com ClientID and Client Secret
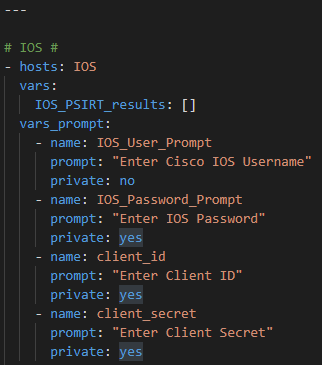
Register the response
Then in the IOS.yml group_vars I have my Ansible network connections
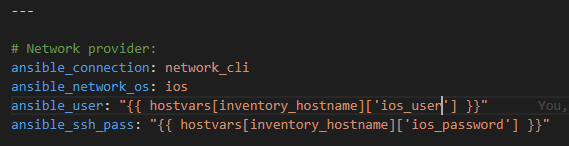
I’ve put all IOS-platforms in this group in the hosts file to target them
Next step run the show version ios_command and register the reponse
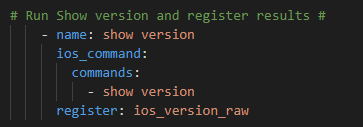
Genie parse and register the JSON

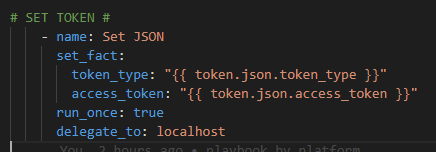
Now we need, just like in Postman, to go get the OAuth2 token but instead of Postman we need to use the Ansible URI module
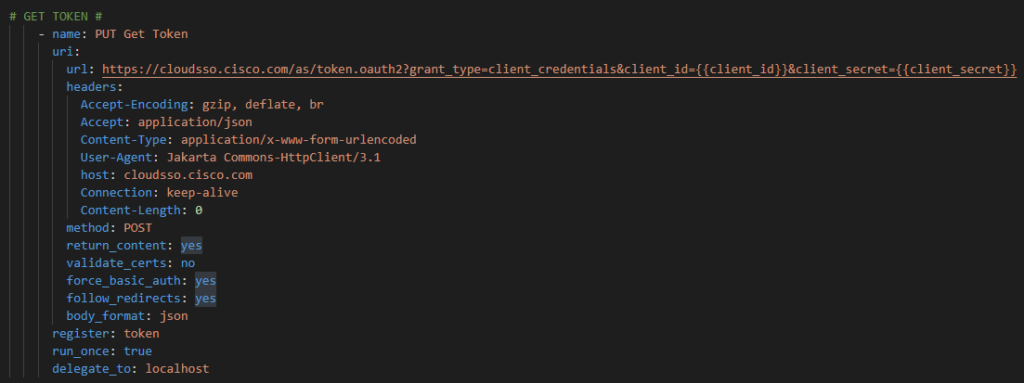
Then we have to parse this response and setup our Bearer and Token components from the response JSON.
Now that we have our token we can authenticate against the IOS open Vulernability API
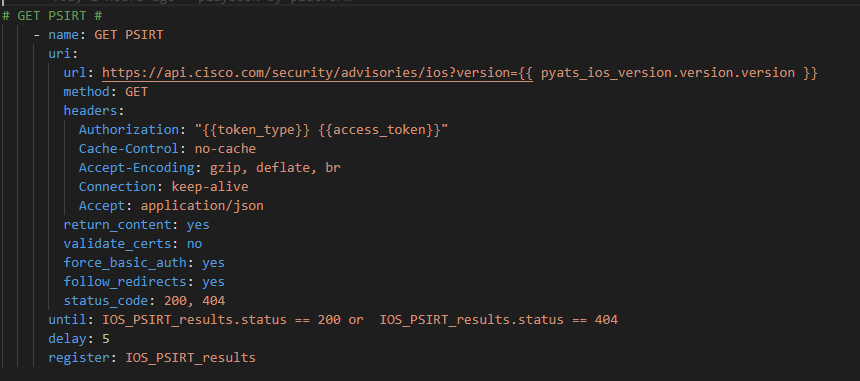
There are a couple of things going on here:
- We are passing the Genie parsed .version.version key to the API for each IOS host in our list
- We are using the {{ token_type }} and {{ access_token }} to Authorize
- We have to expect two different status codes; 200 (flaws found on a host) and 404 (no flaws for the host software version)
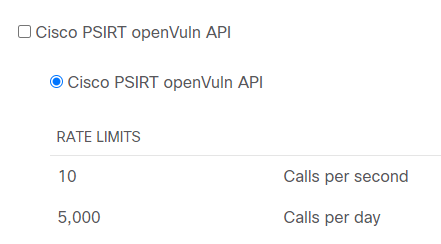
- I’ve added until and delay to slow down / throttle the API requests as not to get a 406 back because I’ve overwhelmed the 10 requests per second upper limit
- We register the JSON response from the API
As always I like to create a “nice” (easy to read) version of the output in a .json file
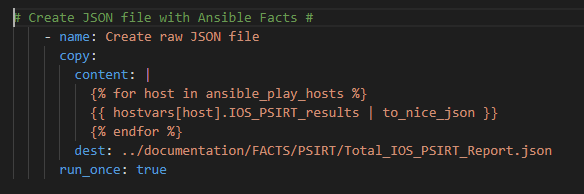
Note we need to Loop over each host in our playbook (using the Ansible magic variable ansible_play_hosts) so the JSON file has a data set for each host in the playbook.
Lastly we run the template module to pass the data into Jinja2 where we will create a business-ready CSV file
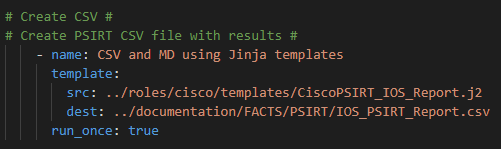
Which looks like this broken apart:

Like building the JSON file first we need to loop over the hosts in the playbook.
Then we check if the errorCode is defined. You could also look at the 404 status code here. Either way if you get the error it means there are no vulnerabilities.
So add a row of data with the hostname, “N/A” for most fields, and the json.errorMessage from the API (or just hardcode “No flaws” or whatever you want here; “compliant”)
Now if the errorCode is not defined it means there are open flaws and we will get back other data we need to loop into.

I am choosing to do a nested set of two loops – one for each advisory in the list of advisories per software version. Then inside that loop another loop, adding a row of data to the spreadsheet, for each BugID found as well (which is also a list).
There are a few more lists like CVEs for example – you can either loop of these as well (but we start to get into too much repetition / rows of data) – or just use regex_replace(‘,’,’ ‘) to remove all commas inside a field. The result is the list spaced out inside the cell sorted alphabetically but if you do not do this it will throw off the number of cells in your CSV
The results
What can you do with “just” a CSV file?
With Excel or simply VS Code with the Excel Preview extension – some pretty awesome things!
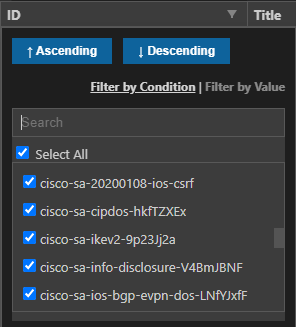
I can, for example, pick the ID field and filter down a particular flaw in the list – which would then provide me all the hosts affected by that bug
Or pick a host out of the list and see what flaws it has, if any. Or any of the columns we have setup in the Jinja2
Included in the report is also the SEVERITY and BASE SCORE for quick decision making or the Detailed Publication URL to get a detailed report for closer analysis.


Automation is much more than configuration management. It can be used to manage, understand, and mitigate risk as well.
Together we can secure our enterprise networks and hopefully sleep a little more sound knowing they are safe.


