I already have working automation solutions and I think I can translate / refactor / at least be inspired by previous Ansible-based solutions.
Where to start?
I’ve been down the road of learning network automation from scratch – this time let’s start with simple information gathering and transformation.
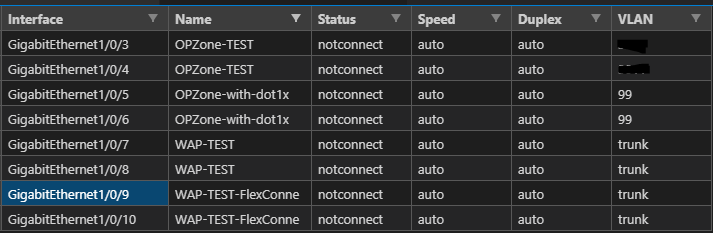
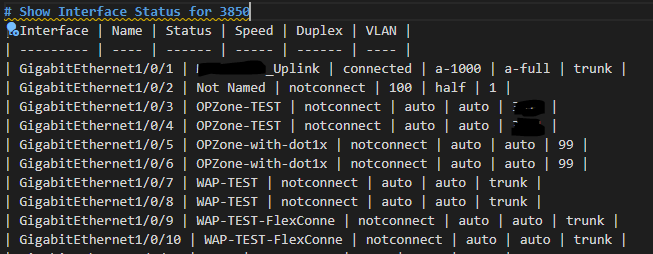
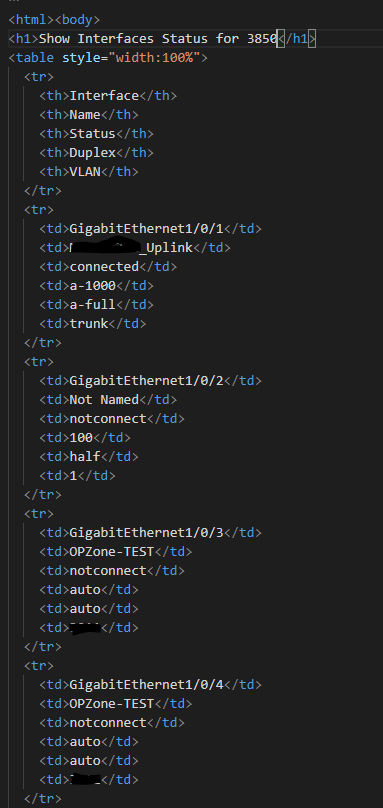
Speaking of inspiration – I am going to start with a “Just the Facts” approach and go get – show interfaces status – my favourite command – into a CSV, MD, and this time let’s spice it up and also throw in an HTML page. From Genie parsed JSON.
Only this time using pure Python – no Ansible training wheels (crutches ?)
How to attack this ?
Break it down in human language and then see if we can translate it to Python is one approach. Another is to find working examples and guides provided by the Cisco team. Using a mix of the two and some other online resources here is how I did it.
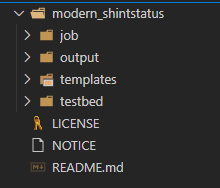
The job folder is where I will keep the pyATS job file and and code file. Output will hold the 3 output files. I plan on hopefully using Jinja2 just like in Ansible so we need a Templates folder. Finally pyATS uses the concept of testbed files to setup connectivity and authentication. These are very similar to Ansible group_vars.
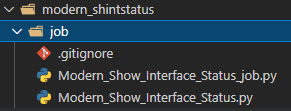
I’ve included a .gitignore file to keep the .pyc files out of the Git repository.
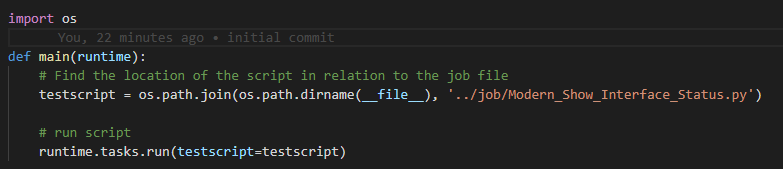
The Job file. This is a pyATS control file you can use to run the code. You can feed arguments in this way but I have not done that here.
The job file
Pretty simple so far – import the os and run the code.
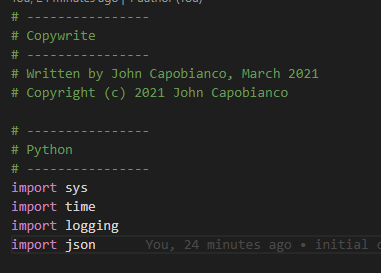
First thing in the Python code is to setup the Python environment you need. Make sure to import JSON as we need to work with the Genie parsed data.
The actual code
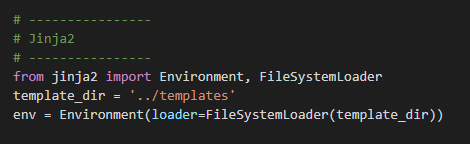
Next we will setup Jinja2 and the File loader
Jinja2 setup
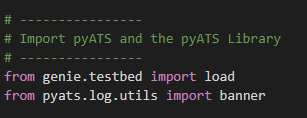
Now we import Genie and pyATS
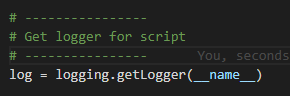
Setup a logger
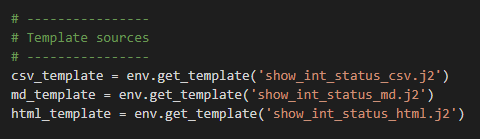
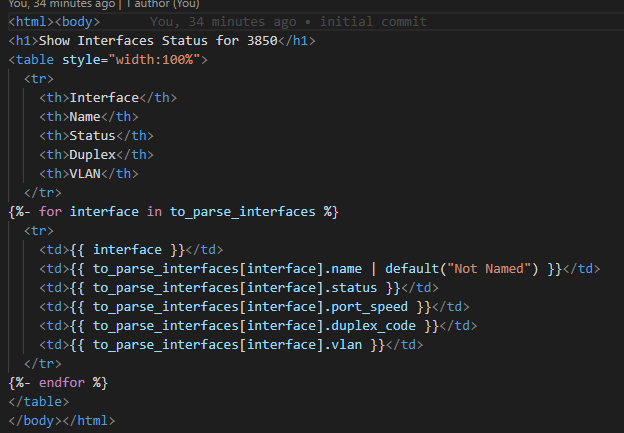
Ok so we need 3 source templates one for each file type
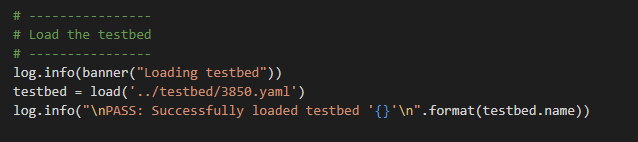
Turn on the logger
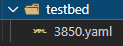
Let’s load up the testbed file
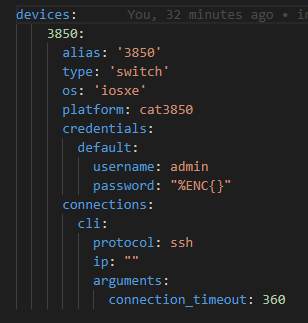
A testbed looks like this:
Note that yes! We CAN encrypt the string! %ENC{ } represents the pyATS encrypted string! Safe to store in Git repos!
Now some magic – we parse our command into a variable as JSON
Run the results thru the templates
While look like this:
CSVMarkdownHTML
Then we create the output files back in Python to finish the playbook
Which look like – ha! – we dont know if this works yet! Lets check it out!
The job in action
The command to run the job
Next it loads up the testbed
pyATS is very verbose but in a good verbose with valuable information about your job
Next the actual SSH connection sets up using Unicron (this is different than Ansible which uses paramiko)
Ok my device’s banner is displayed. My banner is left over from some CI/CD work but it’s the right banner – I’m in !
Some basic platform stuff gets dumped to the job log followed by my next job steps
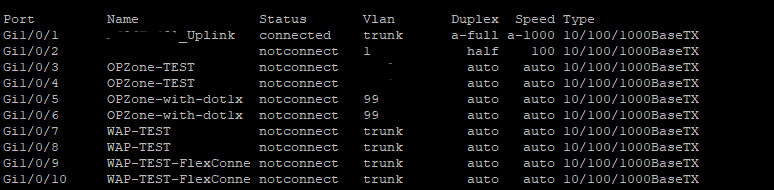
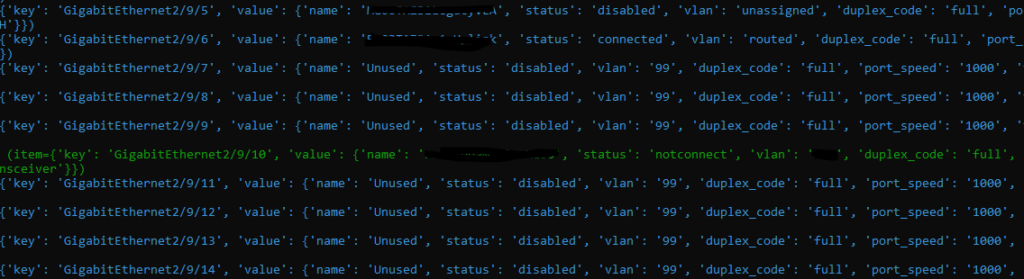
It seems to be working so farshow interfaces status
Ok it’s fired the command! Milestone in the job reached – now it should register this result as JSON in a variable next.
Now during my development I added the following to confirm this step was working to dump the variable to the screen:
print {{ variable name }}
Print replaces debug: msg=”{{ }}” – good!
Similar to an Ansible recap we get a pyATS Easypy Report
Easypy Report > Ansible.log
The Git Add * test
I like to build suspense so I change directories up a folder and try to stage, hopefully, the 3 new files into Git
It means, seemingly, I’ve been mastering the wrong tool. That a faster, easier, and more elegant tool is available. This is ok – I feel like Ansible was primary school and I’m moving into the next stage of my life as a developer and moving up into high school with Python.
It also means I have a lot of code to refactor into Python – also fine – a good opportunity to teach my colleagues.
I also means I will be focusing less and less on Ansible I think and more and more on Python
20 years ago I was studying to become a computer programmer analyst in college writing C++, Java, Visual Basic 6, COBOL, CICS, JCL, HTML, CSS, SQL, and JavaScript and now, two decades later, I still have the magic touch and have figured out Python.
You can expect a lot more solutions like this – in fact I am going to see if I can work in my #chatbot / #voicebot capabilities into Python.
A modern approach to the Cisco IOS-XE show interfaces status command using Python pyATS / Genie and Jinja2 templating to create business-ready CSV, Markdown, and HTML files
This next post may seem like science fiction. I woke up this morning and checked that my output files – MP3 files – really did exist and that I actually made my Cisco network “talk” to me!
This post is right out of Star Trek so strap yourself in!
Can we make the network talk to us?
After my success with my #chatbot my brain decided to keep going further and further until I found myself thinking about how I could actually make this real. Like most problems let’s break it down and describe it. How much of this can I already achieve and what tools do I need to get the rest of the solution in place?
I know I can get network data back in the form of JSON (text) – so in theory all I need is a text-to-speech conversion tool.
Enter: Google Cloud !
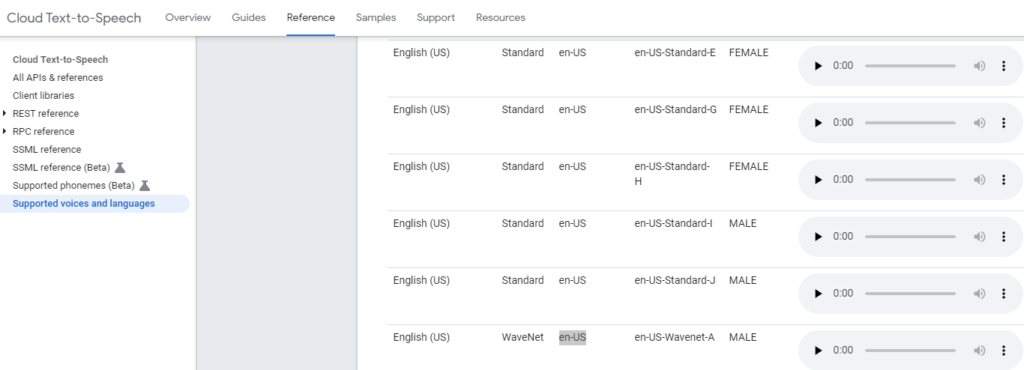
That’s right Google Cloud offers exactly what I am looking for – a RESTful API that accepts text and returns “speech” ! With over 200 languages in both male and female voices I could even get this speech in French Canadian spoken in a dozen or so different voices!
I am getting ahead of myself but that is the vision:
Go get data, automatically, from the network (easy)
Convert to JSON (also easy)
Feed the JSON text to the Google Cloud API (in theory, also easy)
The process – Google Cloud setup
There is some Google Cloud overhead involved here and this service is “free” – for up to 1 million processed text words or 3 months whichever comes first. It also looks like you get $300 in Google bucks and only 3 months of free access to Google Cloud.
Credit card warning: You need a credit card to sign up for this. They assured me, multiple times, that this does not automatically roll over to a paid subscription after the trial expires you have to actually engage and click and accept a full registration. So I hope this turns out to be free for 3 months and no actual charges show up on my credit card. But in the name of science fiction I press on.
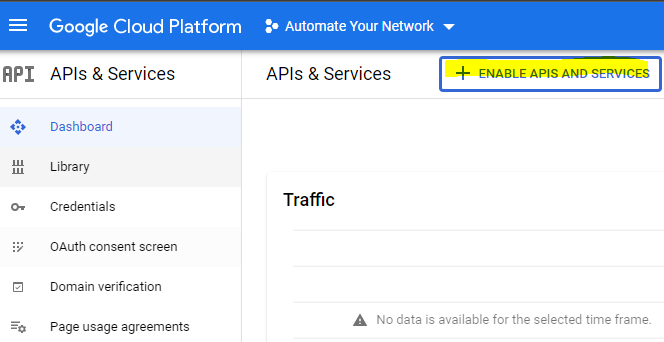
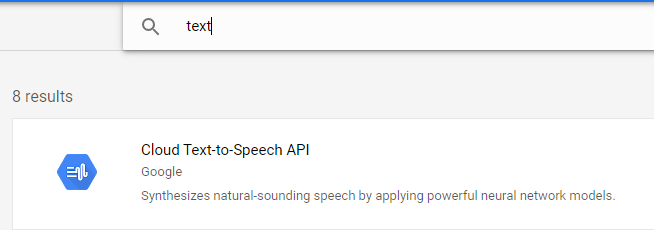
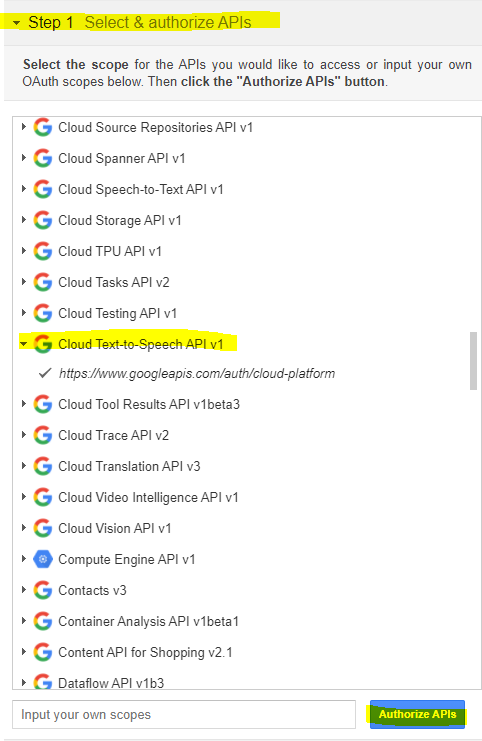
So go setup a Google Cloud account and then your first project and eventually you will land on a page that looks like this.
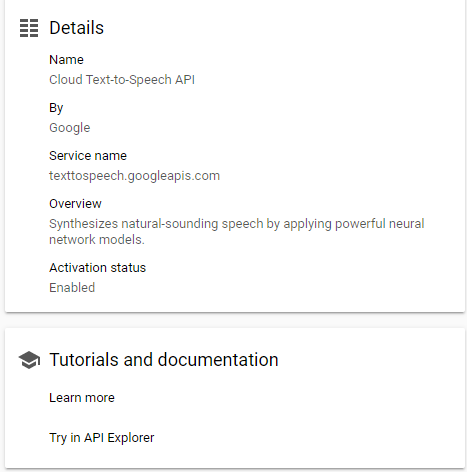
Enable an API and search for text
Enable this API and investigate the documentation and examples if you like.
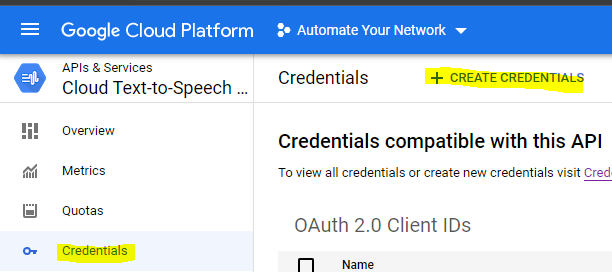
Now Google Cloud APIs are very secure to the point of confusion. So I have not fully ironed out the whole automation pipeline yet – mainly because of how complex their OAuth2 requests seem to be – but for now I have a work around I will show you to at least achieve the theoretical goal. We can circle back and mess with the authentication later. (Agile)
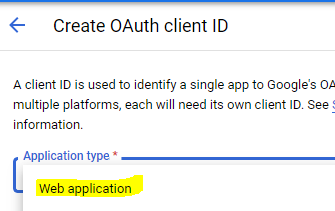
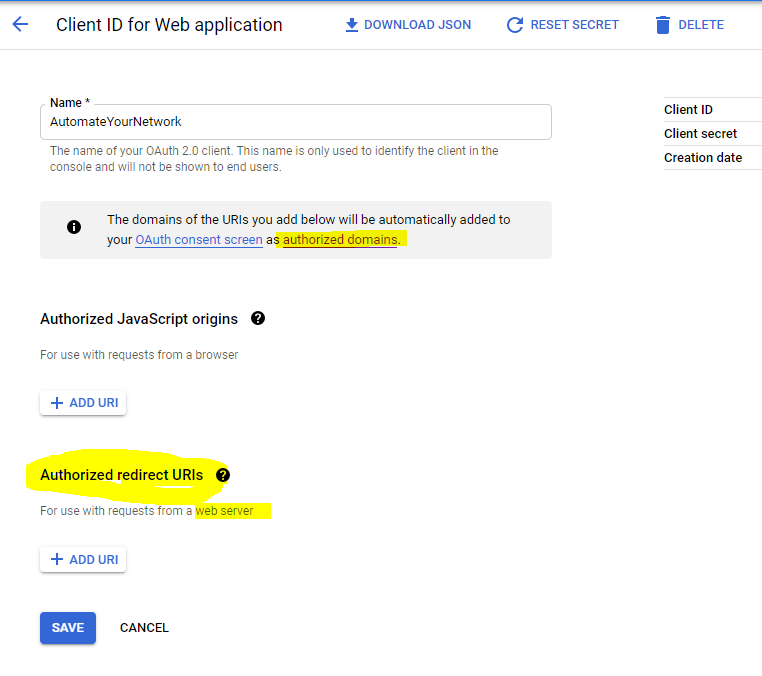
Setup OAuth2 credentials (or a Service Account if you want to use a JSON file they provide you)
Make sure it is a Web Application
This will provide you your clientID and secret.
For most OAuth2 that’s all you need – maybe I am missing the correct OAuth2 token URL to request a token but for now there is another tool you can use to get a token.
Google has an OAuth2 Developer Playground you can use to get a token while we figure out the OAuth stuff in the background
Follow the steps to select the API you want to develop (Cloud Text-To-Speech)
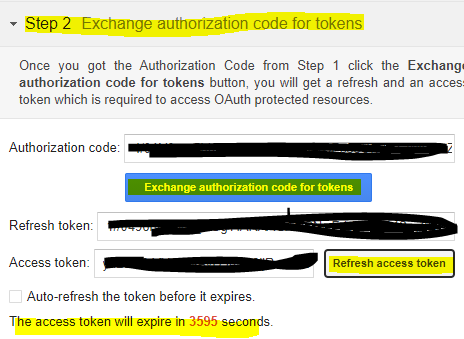
Then in the next step you can request and receive a development token
You can also refresh this token / request a new token. So copy that Access Token we will need it for Postman / Ansible in the next steps.
Moving to Postman
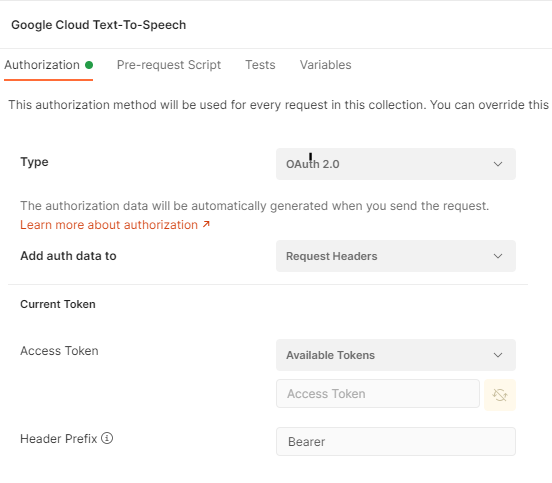
Normally under my collection I would setup my OAuth – here is the screenshot of the settings I’m just not sure of. And here is the missing link to full automation.
So far so good here
Again, this might be something trivial and I am 99% sure its because I have not setup this redirection or linked the two things but it was getting late and I wanted to get this working and not get stuck in the OAuth2 weeds
First here is what I think I have right:
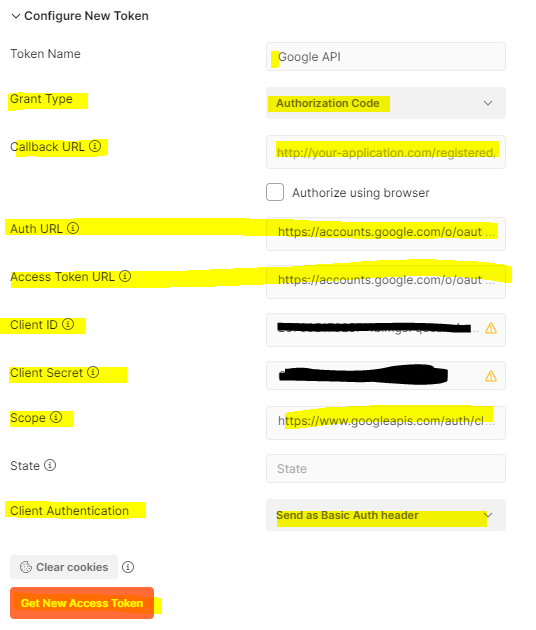
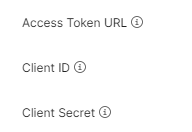
Token name: Google API Auth URL: https://accounts.google.com/o/oauth2/auth Access Token URL: https://accounts.google.com/o/oauth2/token Client ID: Client Secret: Scope: https://www.googleapis.com/auth/cloud-platform
But what I’m not really sure what to do with is this Callback URL – I don’t have one of those ?
Callback URL: This is my problem I am really not sure what I need to do here ?
I believe I need to add it here:
But I have no cookie crumbs to follow all of the ? help icons are sort of “This is where your Authorized redirect URLs go” and thats it ?
Open call to Google Cloud Development – I just need this last little step then the rest of this can be automated
Anyway moving along – pretending we have this OAuth2 working – we can cheat for now using the OAuth2 Playground method.
So here is the Postman request:
We want a new POST request in the Google Cloud API Postman Collection. The URL is:
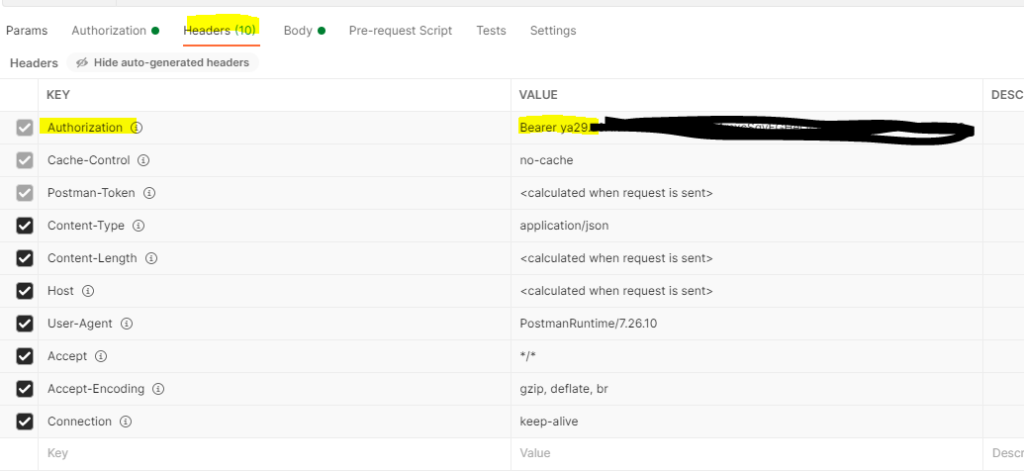
So cheat (for now) and grab the token from the OAuth2 Playground and then in your Postman Request Authorization tab – select Bearer Token and paste in your token. From my experience this will likely start with ya29 (so you know you have the right data here to paste in)
Tab over to Headers and double-check you have Bearerya29.(your key here)
As far as the body goes – again we want RAW JSON
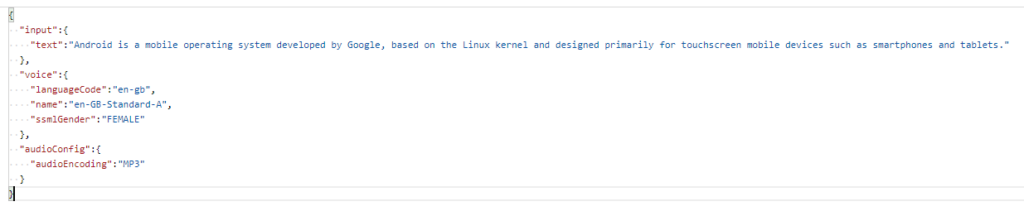
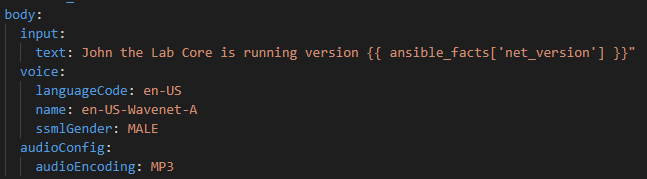
Now for the science fiction – in the body, in JSON, we setup what text we want to what speech
The canned example they provide
So we need the input (text) which is the text string we want converted.
We then select our voice – including the languageCode and name (and there are over 200 to choose from) – and the gender of the voice we want.
Lastly we want the audioConfig including the audioEncoding – and since MP3 was life for me in the mid to late 90s – let’s go with MP3 !
Hit Send and fire away!
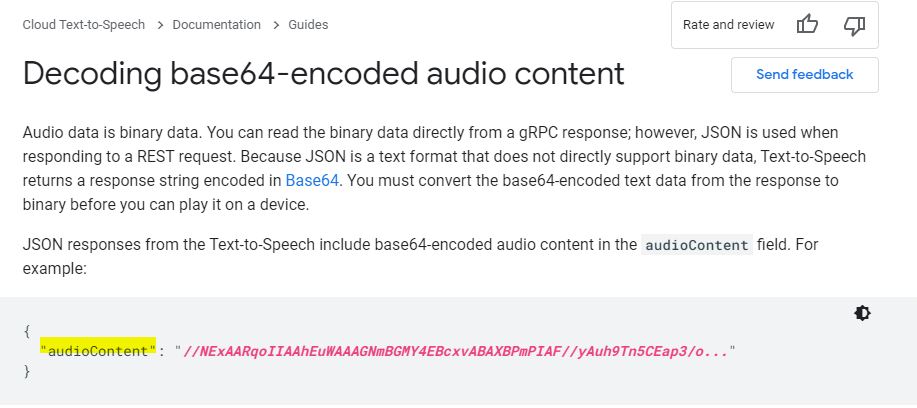
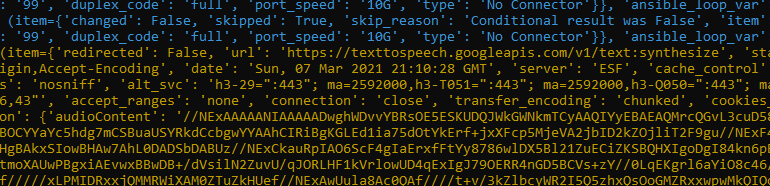
Good start – a 200 OK with 52KB of data returned. It is returned as a JSON string:
Incredible stuff – this is the human voice pattern saying the text string – expressed as a base64-encoded audio string !
Ok – very cool stuff – but what am I supposed to do with it?
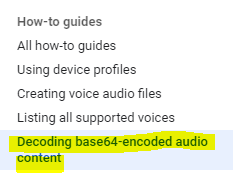
Fortunately Google Cloud has the insight we need
Hey – it’s exactly where we are at ! We have the audioContent and now we need to decode it!
Since I am still developing in my Windows world with Postman let’s decode our canned example
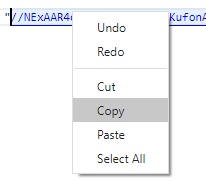
Carefully right-click copy (don’t actually click the link Postman will spawn a GET tab against the URL thinking you are trying to follow the URL along)
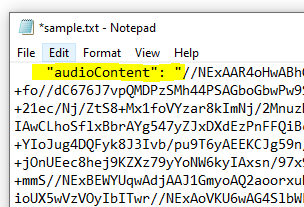
Now create a standard text (.txt) file in a C:\temp\decode folder and paste in the buffered response
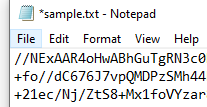
I’ve highlighted the “audioContent”: “ – you have to strip this out / delete it as well as the last trailing “ at the end of the string – we just want the data starting with // and beyond to the end of the string
Lauch cmd and change to the C:\Temp\Decode folder and run the command
certutil -decode sample.txt sample.mp3
As you see if your text file was valid you should get a completed successfully response from the certutil utility. If not – check your string again for leading and trailing characters.
Otherwise – launch the file and have a listen!
How cool is that?!?!?
Enter: Network Automation
As I’ve said before anything I can make with with Postman I can automate with the Ansible URI module! But instead of some static text – I plan on getting network information back and having my network talk to me!
The playbook:
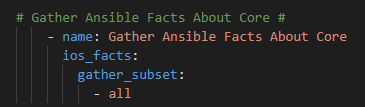
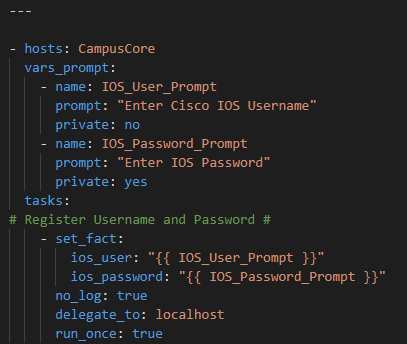
First we will prompt for credentials to authenticate
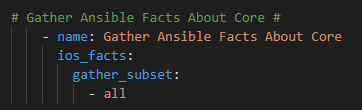
Now – let’s start with something relatively simple – can I “ask” the Core what IOS version it’s running? Sure – let’s go get the Ansible Facts, of which the IOS version is one of them, and pass the results along to the API !
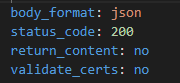
For now we will hard code our token – again once I figure this out I will just have another previous Ansible URI step to go get my token with prompted ClientID / Client Secret at the start of the playbook along with the Cisco credentials. Again, temporary work around
Again because I have used body_format: json I can write the body in YAML.
Ok so for our body let’s have some fun and try an English (US) WaveNet-AMale.
For the actual text lets mix a static string “John the Lab Core is running version” and then the magic Ansible Facts variable {{ ansible_facts[‘net_version’] }}
And see if this works
We need to register the response from the Google Cloud API and delegate the task to the localhost:
So now we need to parse and get just the base64-audio string into a text file. Just like in Postman this is contained in the json.audioContent key:
Now we have to decode the file! But this time with a Linux utility not a Windows utility
We can call the shell from Ansible easily to do this task:
Now in theory this should all work and I should get a text file and an MP3 file. Let’s run the playbook!
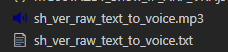
Lets check if Git picked a new file!
Ok ! What does it sound like!?!
Ok this is incredible!
Let’s try some Genie / pyATS parsing and some different languages !
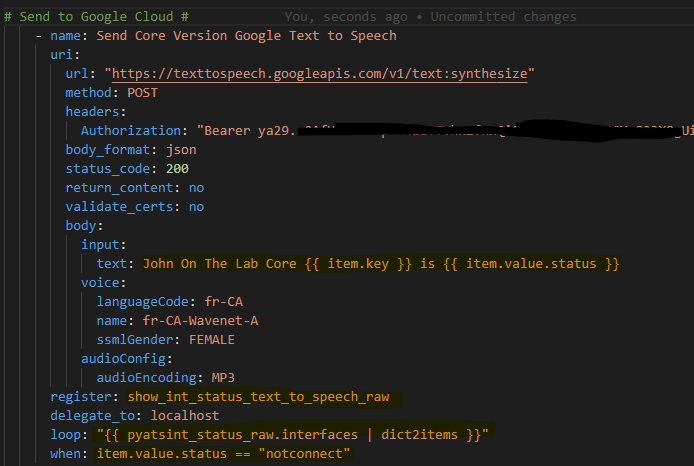
Copy and paste and rename the previous playbook and call the new file GoogleCloudTextToSpeech_Sh_Int_Status.yml
Replace the ios_facts task with the following tasks
So now for our actual API call we want to conditionally loop over each interface if is DOWN / DOWN (meaning not UP / UP and not administratively DOWN)
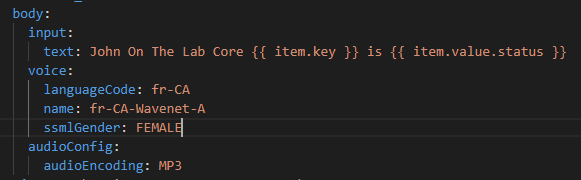
Now as an experiment – let’s use French – Canadian in a FemaleWavenet voice.
Does this also translatethe English text to French? Do do I need to write the text en francais? Lets try it!
So this whole task now looks like this:
Now we need another loop and another condition to register the text from the results. We loop over the results of the first loop and when there is audioContent send that content to the text file.
Caution! RegEx ahead! Don’t be alarmed! Because of the “slashes” in an interface (Gigabit10/0/5) the file path will get messed up so let’s regex them to underscores
Then we need to decode the text files!
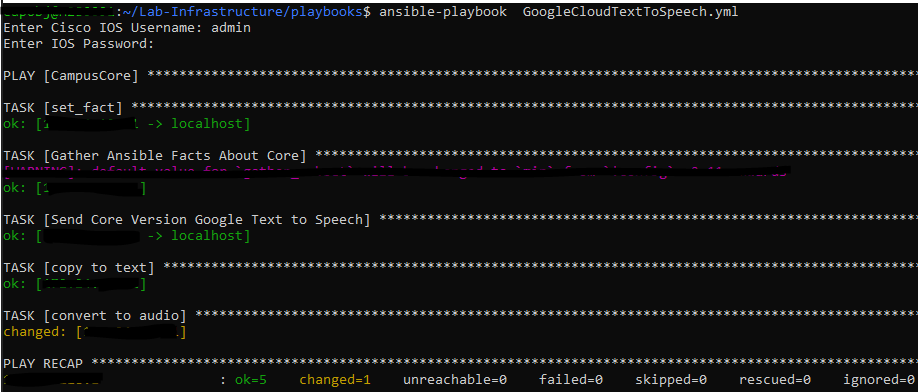
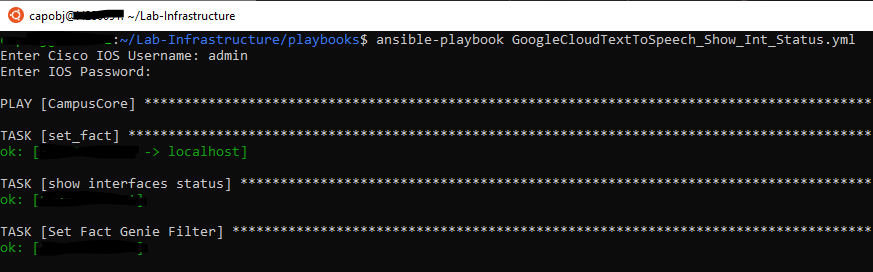
So let’s run the playbook!
So far so good – now our conditionals should kick in – we should see some items skipped in light blue text then our match hits in green
Similarly, our next step should also have skipped items and then yellow text indicating the audioContent has been captured
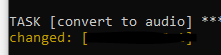
Which is finally converted to audio
What does it sound like!??! Did it automatically translate the text as well as convert it to speech?
TenGig
Gig
A little more fun with languages
I won’t post all the code but I’ve had a lot of fun with this !
How about the total number of port-channels on the Core – in Japanese ?!
Summary
In my opinion this Google Cloud API and network automation integration could change everything! Imagine if you will:
Global, multilingual teams
Elimination of technical text -> Human constructed phrasing, context, and simplicity
Audio files in your source of truth
Integrated with #chatops and #chatbots
Visually impaired or otherwise physical challenges with text-based operations
A talking network!
This was a lot of fun and I hope you found it interesting! I would love to hear your feedback!
As you may know I love to play with new toys. I especially love connecting new toys with my old toys. What you may not know is that I am also an avid World of Warcraft fan and player! In order to run what are known as “raids”, group content designed for 10 – 30 players, I use a program called Discord.
My goal was simple – could I send myself messages in Discord from my Ansible playbooks with network state data? Could I create a #chatbot in this way ?
As it turns out not only could I achieve this – it is actually pretty straight forward and simple to do!
Setup
There are not a lot of steps in the setup.
Download and install Discord
Setup an account
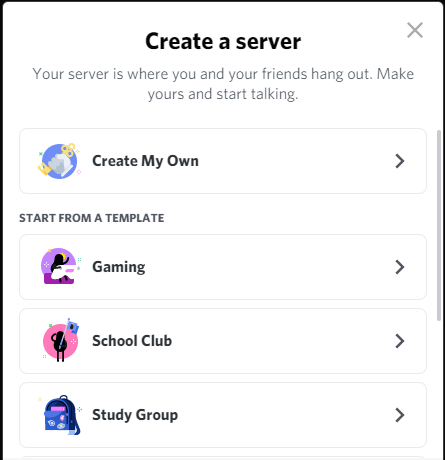
Create a Server
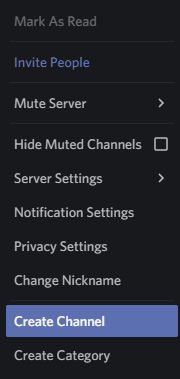
Create a Channel
I named my channel AutomateYourNetwork and set it up as private with invite only RBAC to see the channel
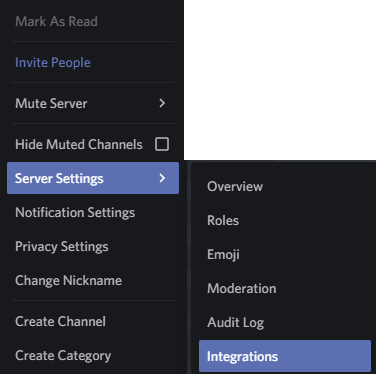
Once we have a server and channel setup we need to setup the Integrations
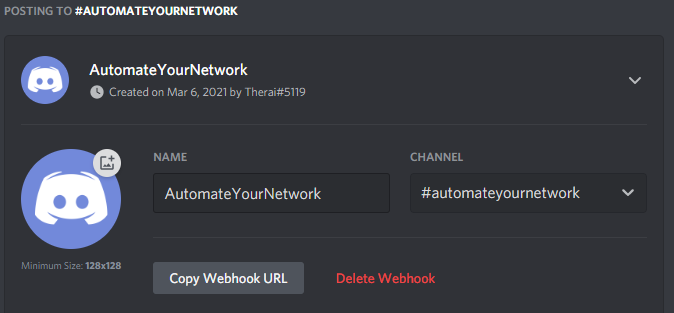
Now setup a WebHook
Select the channel you want your chatbot to send messages to
We will need the Webhook URL
Postman Development
As with all new API development I always start in Postman to sort out the authentication, headers, and body to POST against this new Discord Webhook.
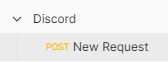
First let’s setup a new Postman Collection called Discord; add a new POST request to this collection
For the request itself make sure you change the default GET to a POST and then use the following URL:
https://discord./com/api/webhooks/< your URL copied from Discord here>
The body is flexible but to get started let’s just use a small set of values.
Set your body to RAW JSON
And add this body (change your username unless you want this message to look like it came from me!!)
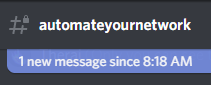
Now if you really want to see how fast / real-time / amazingly cool this is – make sure you have your Discord logged in but minimized to your system tray
Hit SEND in Postman
Your Discord should have notified you about a new message! In my system tray the icon has also changed!
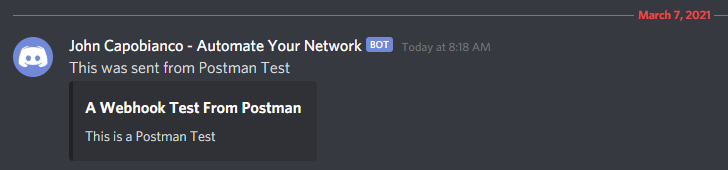
Which is no surprise because back in Postman we see we received a valid 204No Content response from the API
Lets see what Discord looks like
How cool is this?!?
Integrating with Network Automation and Infrastructure as Code
Ok this is great – but can we now integrate this into our CI/CD pipeline Ansible playbooks?
Can I send myself network state data ? Can we create a #chatops bot ?
Yes we can!
Lets start with Ansible Facts – and see if we can chat ourselves the current version of a device.
First let’s setup our credential prompts
Then, let’s use ios_facts
Thats more or less all I need to do – next let’s use the URI module to send ourselves a chat!
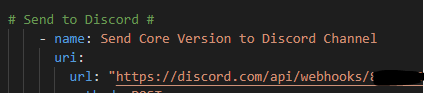
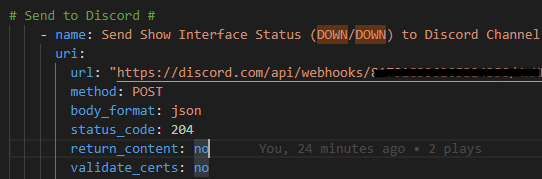
I will break down this next URI task; first setup the URL – again after /webhooks/ {{your URL here }}
This is a POST
I like to do this next step for two reasons; one to set the body of the POST to JSON (obvious) but also to allow me to use YAML syntax in Ansible to write the body of the POST (not so obvious). Without this my body would need the JSON formatting (think moustaches and brackets) which is hard enough to write on it’s own, and very hard to write inside a YAML Ansible task
Meaning I can format the body as such (in YAML):
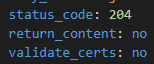
And, like we saw in Postman, we are expecting a 204 back and no content
Make sure you are delegating to the localhost (you dont want this step to run on your Cisco switch)
Again back to the body we are accessing the Ansible magic variable ansible_facts and the key net_version
Lets run the playbook!
Discord looks happy
And, with the power of Internet Magic, here is our message!
This is incredible – let me integrate Cisco Genie / pyATS now and send some parsed network state data next – to show the real power here
The playbook structure is more or less the same so save the Ansible Facts version playbook and copy / rename it to Show Int Status.
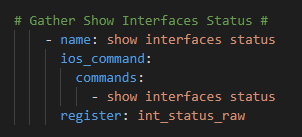
Keep the prompts; remove the ios_facts task and replace it with this task
Followed by the Genie parsing step
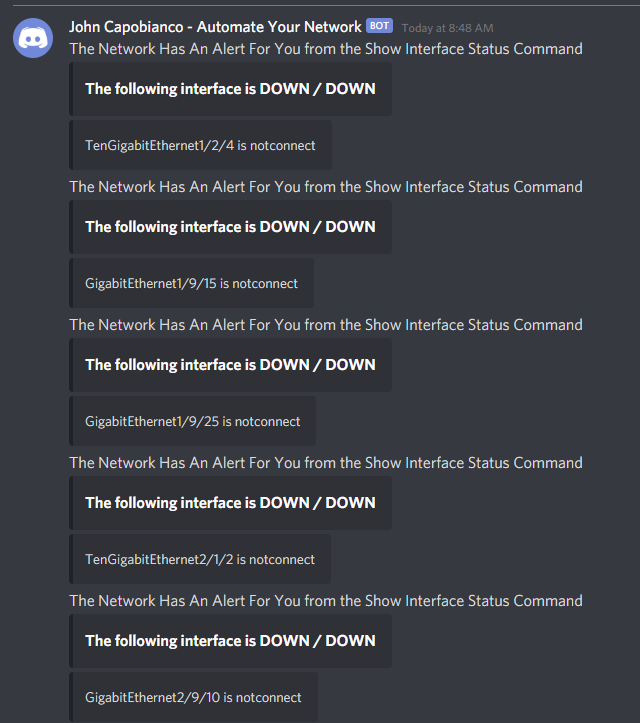
Then we need to adjust the Discord message – for my example I only want a message if, for example, an interface is configured to be UP / UP (meaning it is not administratively down) but is DOWN / DOWN (notconnected state). I don’t care about UP/UP or Administratively Down interfaces.
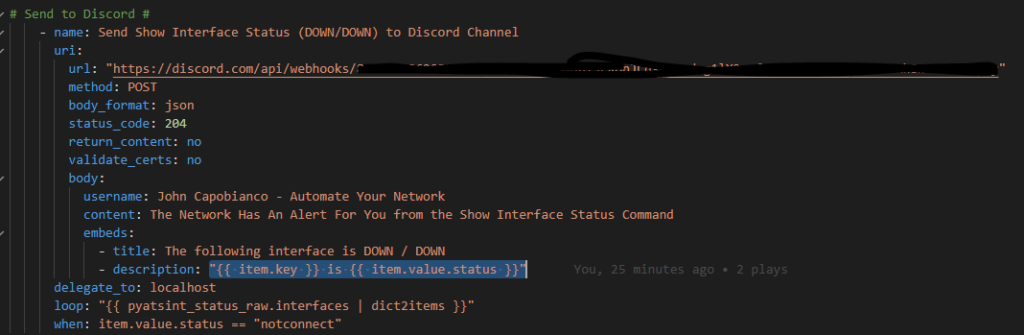
Again, I will break down this
Most of this is the same
Here comes my magic with Genie. We want to loop over each interface Genie has parsed into the registered variable pyatsint_status_raw.interfaces. We need to convert this dictionary into a list of items so filter it | dict2items
Now we want a condition on this loop; only call the Discord API when the {{ item.value.status }} key (that is to say each iteration in the loops status value) when it equals “notconnect“
Now we can reference the item.value for the per-interface name and the item.value.status for the notconnect status when it hits a match in the body of the message we are sending to Discord.
The task as a whole looks like this:
So we run this new playbook which sort of looks like this. Remember we have a condition so the light blue text indicates non-matches / skipped interfaces (because they are connected or admin down); green indicates a hit.
Drumroll please
And now in Discord I have this wonderful, pager-like, real-time “alert”
Now go build one!
Here is the GitHub repository – go try to build one for your network!
Ansible playbooks that chat with Discord using Ansible, Genie/pyATS, and the Discord webhooks that send network state information as a Discord message!
The security of my network keeps me up at night. Honestly it does. We live in a world where enterprise networks are defending themselves against state-sponsored attacks. But what do attackers look for? Typically, open, well-known, vulnerabilities.
Well, at least to the hackers, attackers, and even script-kiddies, these vulnerabilities are well-known. Those playing defense are often a step or two behind just identifying vulnerabilities – and often times at the mercy of patch-management cycles or operational constraints that prevent them of addressing (patching) these waiting-to-be-exploited holes in the network.
What can we do about it?
The first thing we can do is to stay informed ! But this alone can be a difficult task with a fleet of various platforms running various software versions at scale. How many flavours of Cisco IOS, IOS-XE, and NXOS platforms make up your enterprise? What version are they running? And most importantly is that version compromised?
The old way might be to get e-mail notifications (hurray more e-mail!), maybe RSS-feeds, or go device-by-device, webpage-by-webpage, looking up the version and if it’s open to attack or not.
Do you see why, now, how an enterprise becomes vulnerable? It’s tedious and time-intensive work. And the moment you are done – the data is stale – what, are you going to wake up every day and review threats like this manually? Assign staff to do this? Just accept the risk and do they best you can trying to patch quarterly ?
Enter: Automation
These types of tasks beg to be solved with automation !
So how can you do it?
Let’s just lay out a high level, human language, defined use-case / wish list.
Can we, at scale, go get the current IOS / IOS-XE / NXOS software version from a device?
Then can we send that particular version somewhere to find out if it has been compromised ?
Can we generate a report from the data above?
Technically the above is all feasible; easy even!
Yes, we can use Ansible and the Cisco Genie Parser to capture the current software version
As with any new REST API I like to start with Postman and then transform working requests into Ansible playbooks.
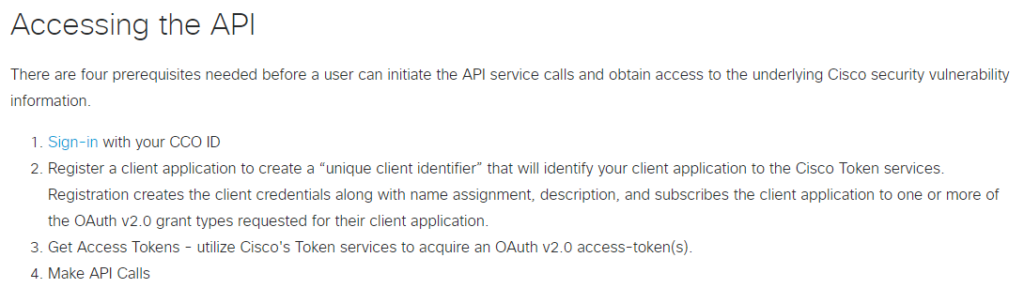
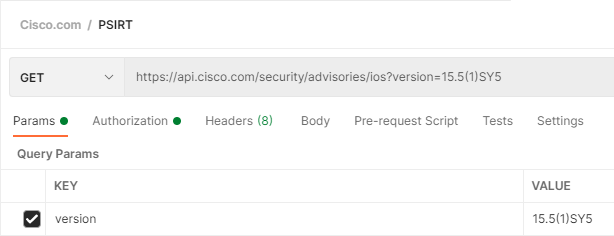
First, under a new or existing Cisco.com Collection, add a new request called IOS Vulnerabilities
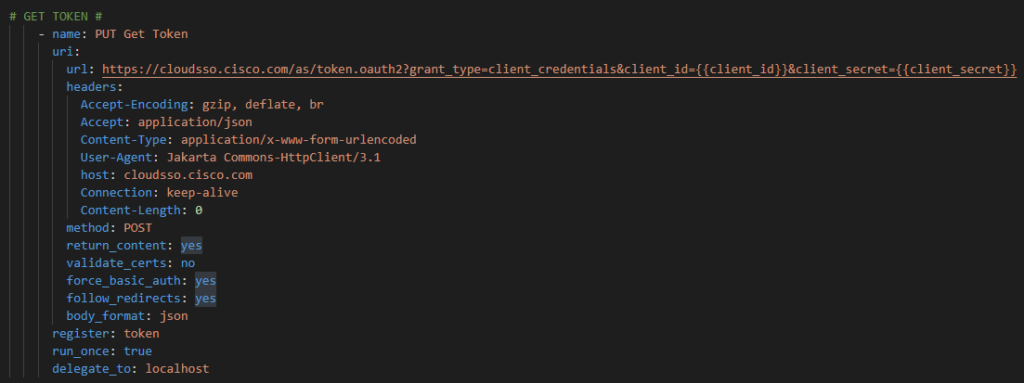
Cisco.com uses OAuth2 authentication mechanism where you first must authenticate against one REST API (https://cloudsso.cisco.com/as/token.oauth2) which provides back authorization Bearer token used to then authenticate and authorize against subsequent Cisco.com APIs
Your Client ID and Secret are found in the API portal after you register the OpenVuln API
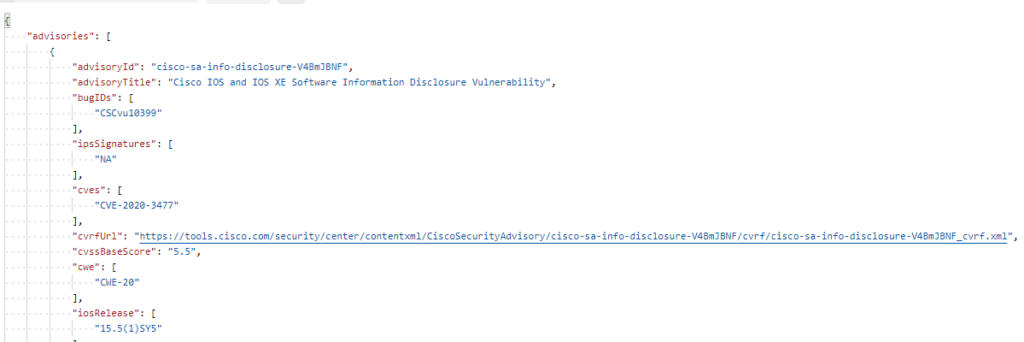
Let’s hard code a version and see what flaws it has
Ok so it has at least 1 open vulnerability!
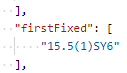
Does it tell us what version fixes it?
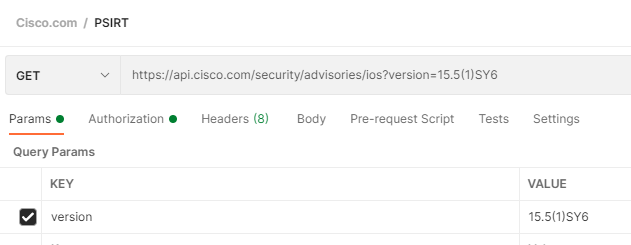
Ok let’s check that version quickly while we are still in Postman
This version has no disclosed vulnerabilities!
One interesting thing of note – and our automation is going to need to handle it – is that if there are no flaws found we get a 404 back from the API not a 200 like our flawed response!
The Playbook
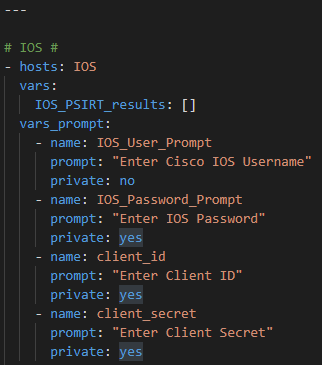
For the sake of the example I am using prompted inputs / response but these variables could easily be hardcoded and Ansible Vaulted.
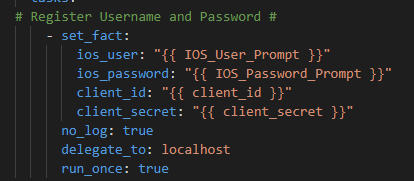
So first prompt for your Cisco hosts username and password and your Cisco.com ClientID and Client Secret
Register the response
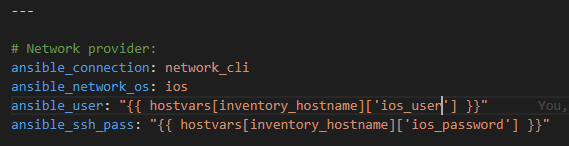
Then in the IOS.yml group_vars I have my Ansible network connections
I’ve put all IOS-platforms in this group in the hosts file to target them
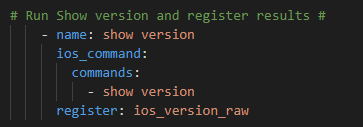
Next step run the show version ios_command and register the reponse
Genie parse and register the JSON
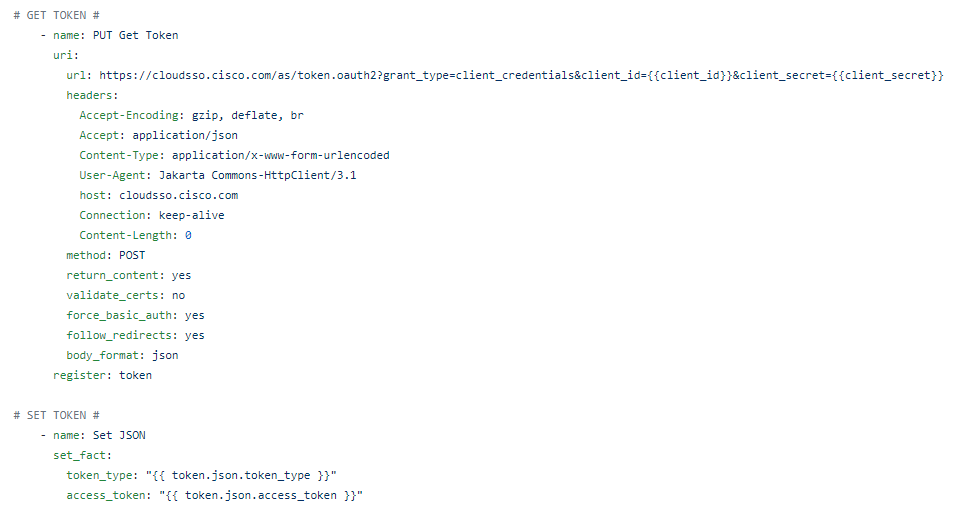
Now we need, just like in Postman, to go get the OAuth2 token but instead of Postman we need to use the Ansible URI module
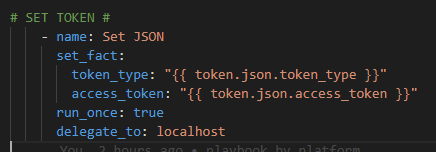
Then we have to parse this response and setup our Bearer and Token components from the response JSON.
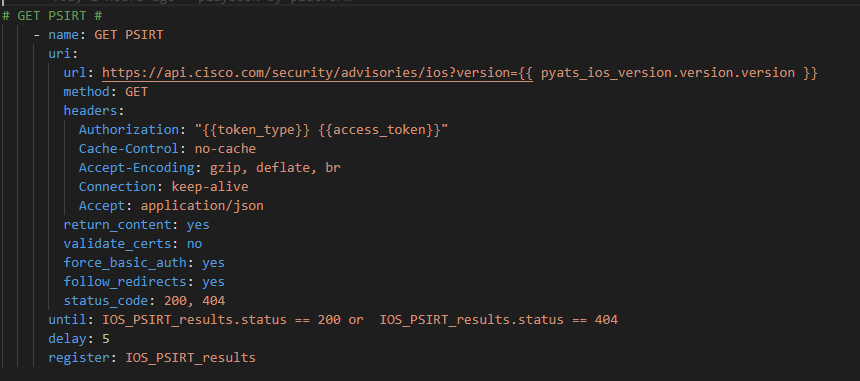
Now that we have our token we can authenticate against the IOS open Vulernability API
There are a couple of things going on here:
We are passing the Genie parsed .version.version key to the API for each IOS host in our list
We are using the {{ token_type }} and {{ access_token }} to Authorize
We have to expect two different status codes; 200 (flaws found on a host) and 404 (no flaws for the host software version)
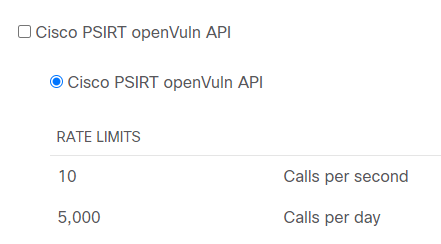
I’ve added until and delay to slow down / throttle the API requests as not to get a 406 back because I’ve overwhelmed the 10 requests per second upper limit
We register the JSON response from the API
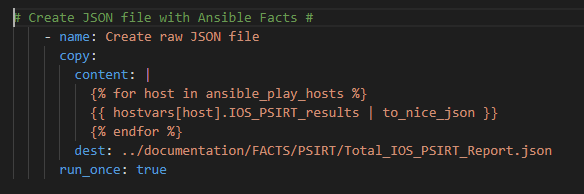
As always I like to create a “nice” (easy to read) version of the output in a .json file
Note we need to Loop over each host in our playbook (using the Ansible magic variable ansible_play_hosts) so the JSON file has a data set for each host in the playbook.
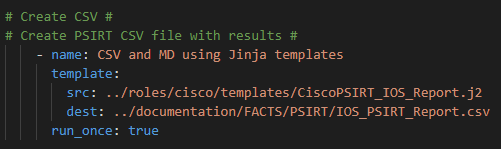
Lastly we run the template module to pass the data into Jinja2 where we will create a business-ready CSV file
Which looks like this broken apart:
Like building the JSON file first we need to loop over the hosts in the playbook.
Then we check if the errorCode is defined. You could also look at the 404 status code here. Either way if you get the error it means there are no vulnerabilities.
So add a row of data with the hostname, “N/A” for most fields, and the json.errorMessage from the API (or just hardcode “No flaws” or whatever you want here; “compliant”)
Now if the errorCode is not defined it means there are open flaws and we will get back other data we need to loop into.
I am choosing to do a nested set of two loops – one for each advisory in the list of advisories per software version. Then inside that loop another loop, adding a row of data to the spreadsheet, for each BugID found as well (which is also a list).
There are a few more lists like CVEs for example – you can either loop of these as well (but we start to get into too much repetition / rows of data) – or just use regex_replace(‘,’,’ ‘) to remove all commas inside a field. The result is the list spaced out inside the cell sorted alphabetically but if you do not do this it will throw off the number of cells in your CSV
The results
What can you do with “just” a CSV file?
With Excel or simply VS Code with the Excel Preview extension – some pretty awesome things!
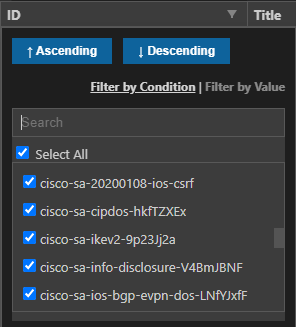
I can, for example, pick the ID field and filter down a particular flaw in the list – which would then provide me all the hosts affected by that bug
Or pick a host out of the list and see what flaws it has, if any. Or any of the columns we have setup in the Jinja2
Included in the report is also the SEVERITY and BASE SCORE for quick decision making or the Detailed Publication URL to get a detailed report for closer analysis.
Here you can easily start capturing Ansible Facts for IOS and NXOS and transform the JSON into CSV and Markdown !
Also included are a bunch of valuable Genie parsed show commands which transform the response into JSON then again transforms the JSON into CSV and Markdown!
The playbooks use Prompts so you should be able to clone the repo and update the hosts file and start targeting your hosts! For full enterprise support I suggest you refactor the group_vars and remove the prompts moving to full Ansible Vault – but for portability and ease of start-up I’ve made them prompted playbooks for now.
I would love to hear how they work out for you – please comment below if you have success!
This major revision basically shifts away from lineinfile to Jinaj2 Templates for scale, performance, readability, and general best practices.
Serial 2 Info
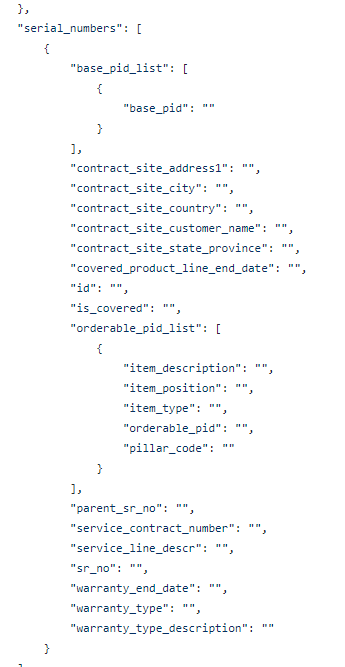
The Cisco Serial 2 Info API receives a valid serial number and then returns structured JSON with your Cisco Contractual information !
The playbook uses the Genie parser to parse the show inventory command
After authenticating against the OAuth 2 service to get a Bearer token
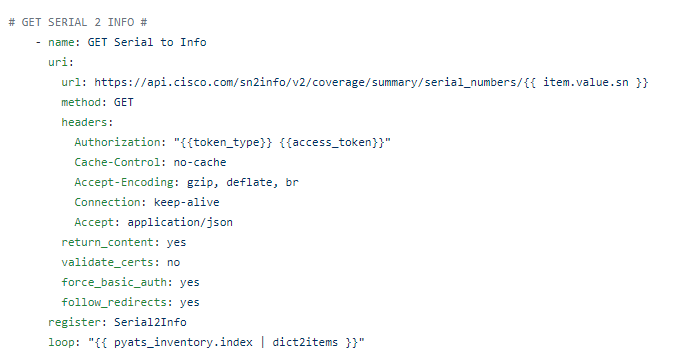
It provides the API the serial number for every part per device.
The API provides the following information back:
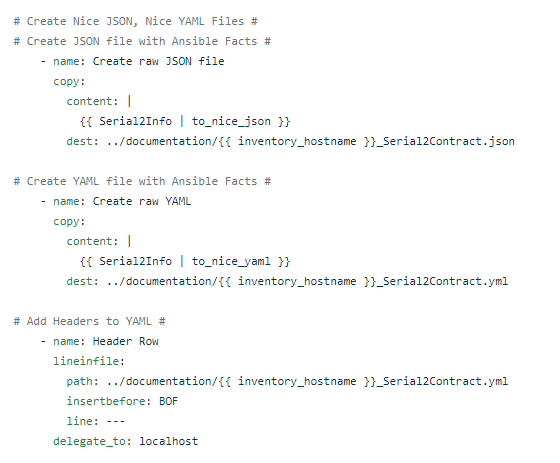
Which we first dump into JSON and YAML files
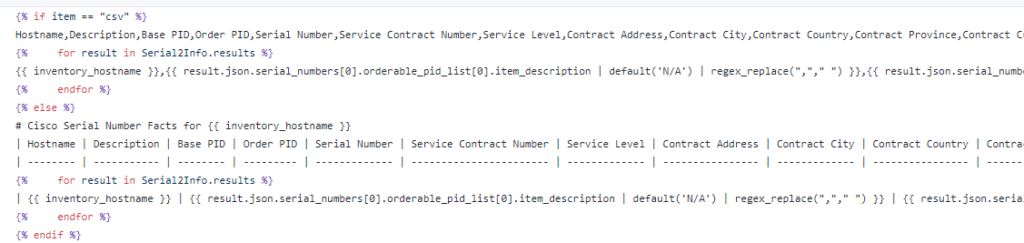
Then template into CSV and MD
Using Jinja2
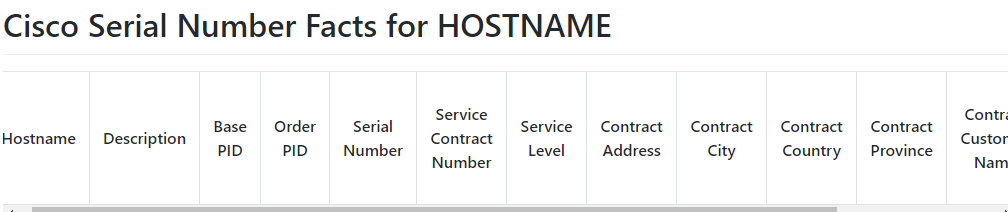
Which gives us:
Recommended Release
The other, very similar, Ansible playbook uses the Cisco Recommended Release API to create a spreadsheet with the current image on a host and the Cisco recommended version for that host given the Part ID (PID)
Here we don’t even have to use Genie to parse we can use the Ansible Facts module
And we transform again with Jinja2
And get this create report!
Please reach out to me directly if you need any help implementing these playbooks but I believe the instructions and code to be easy enough any beginner, with a little bit of refactoring and thought, could use this code as a starting point in their automation journey.
Ansible playbooks that capture serial number and PID and send them to the Cisco.com APIs transforming the response into business-ready documents. Version 2.0 uses Jinja2 templates.
One of my favourite recipes is the Hakuna Frittata both because not only am I a big fan of puns, I also enjoy this hearty vegetarian meal that even I can handle putting together.
Inspired by this simple recipe I have decided to try and document my highly successful Ansible Cisco NXOS Facts playbook that captures and transforms raw facts from the data centre into business-ready documentation – automatically.
Ansible Cisco NXOS Facts to Business-Ready Documentation Prep: 60-90 Min Cook: 2-3 Min Serves: An entire enterprise
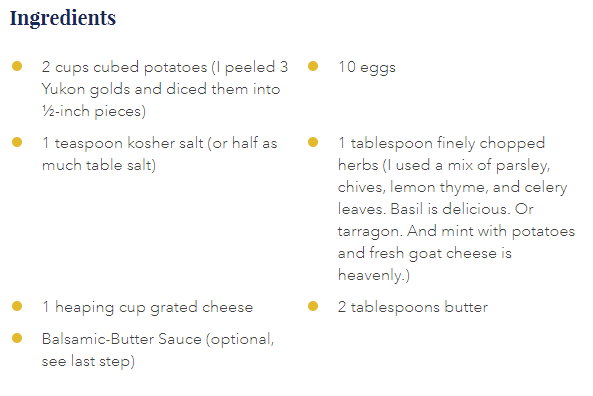
Ingredients
1 Preheated Visual Studio Code 1 Git repository and Git 1 stick of Linux (a host with Ansible installed and SSH connectivity to the network devices) 3 pinches of Python filters 1 Cup of Ansible playbook (a YAML file with the serially executed tasks Ansible will perform) 1 Cup of Ansible module – NXOS_Facts 2 Tablespoons of Jinja2 Template 1 Teaspoon of hosts file 1 Tablespoon of group_vars 2 Raw Eggs – Cisco NXOS 7000 Aggregation Switches
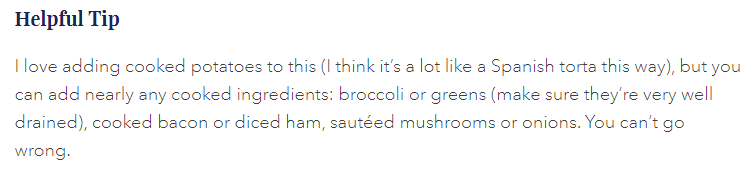
Helpful Tip
This is not magic but did not necessarily come easy to me. You can use debug and print msg to yourself at the CLI. At each step that I register or have data inside a new variable I like to print it to the screen (one to see what the data, in JSON format, looks like; and two, to confirm my variable is not empty!)
Directions
1. You will need to first setup a hosts file listing your targeted hosts. I like to have a hierarchy as such:
hosts [DC:children] DCAgg DCAccess
[DCAgg] N7K01 N7K02
[DCAccess] N5KA01 N5KB01 N5KA02 N5KB02
Or whatever your logical topology resembles.
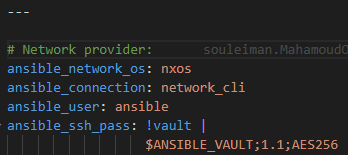
2. Next we need to be able to securely connect to the devices. Create a group_vars folder and inside create a file that matches your hosts group name – in this case DC.yml
DC.yml +
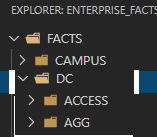
3. Create all the various output folder structure you require to store the files the playbook creates. I like something hierarchical again:
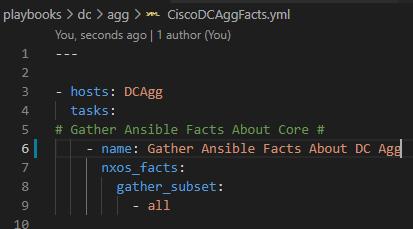
4. Create a playbooks folder to store the YAML file format Ansible playbook and a file called CiscoDCAggFacts.yml
In this playbook, which runs serially, we first capture the facts then transform them into business-ready documentation.
First we scope our targeted hosts (hosts: DCAgg)
Then we use the NXOS_Facts module to go gather all of the data. I want all the data so I choose gather_subset : – all but I could pick a smaller subset of facts to collect.
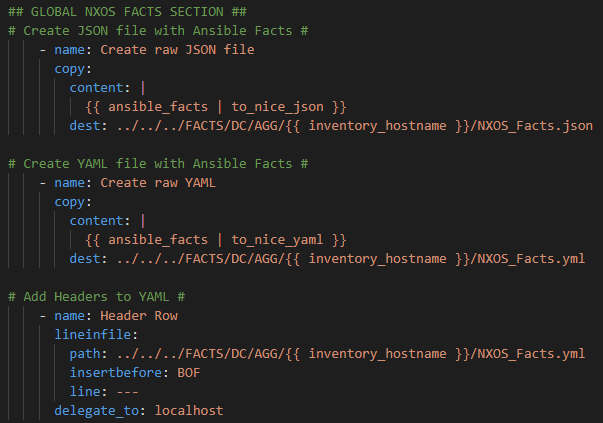
Next, and this is an important step, we take the captured data, now stored in the magic Ansible variable – {{ ansible_facts }} and put that into output files.
Using the | to_nice_json and | to_nice_yamlPython filters we can make the “RAW JSON” inside the variable (one long string if you were to look at it) into human-readable documentation.
4b. Repeatable step
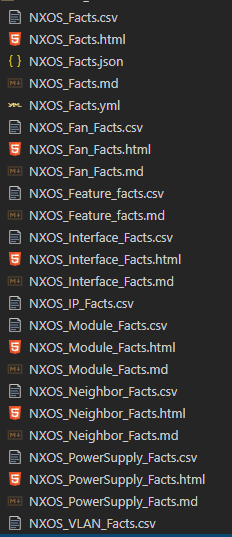
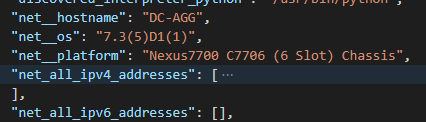
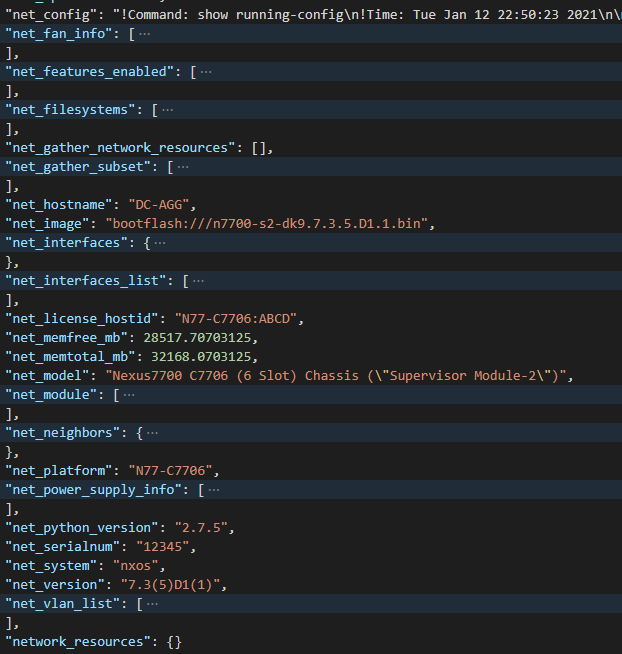
NXOS Facts provides facts that can be put into the following distinct reports:
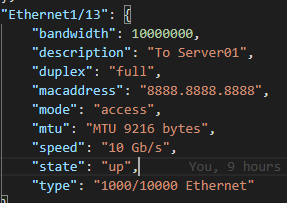
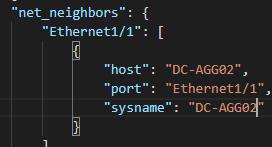
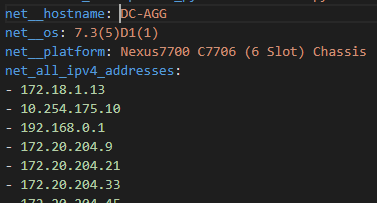
Platform information (hostname, serial number, license, software version, disk and memory information) A list of all of the installed Modules hosted on the platform A list of all IP addresses hosted on the platform A list of all VLANs hosted on the platform A list of all of the enabled Features on the platform A list of all of the Interfaces, physical and virtual, including Fabric Extenders (FEX) A list of all connected Neighbors Fan information Power Supply information
For some of these files, if the JSON data is structured in way that lends itself, I will create both a Comma-Separated Values (csv; a spreadsheet) file and a markdown (md; “html-light”) file. Some of the reports is just the csv file (IPs, Features, VLANs specifically).
The follow code can be copied 9 times and adjusted by updating the references – the task name, the template name, and the output file name – otherwise the basic structure is repeatable.
In order to create the HTML mind map you will also need mark map installed.
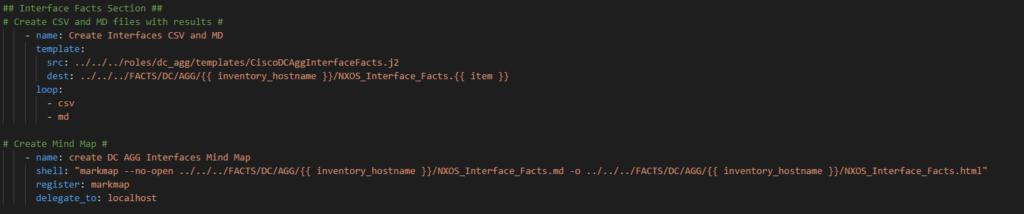
Another example of the code – this is the Interfaces section – notice only the name, src, and dest file names need to be updated as well as the MD and HTML file names in the shell command.
5. The Jinja2 Templates
Now that we have finished our Ansible playbook we need to create the Jinja2 templates we reference in the Ansible template module (in the src line)
Create the following folder structure to store the templates:
roles\dc\dc_agg\templates
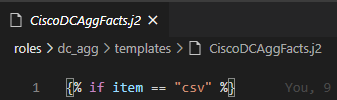
Then, for each of the 9 templating tasks, create a matching .j2 file – for example the “base facts” as I like to call them – CiscoDCAggFacts.j2
In this template we need an If Else End If structure to test if we are templating csv or markdown then some For Loops to iterate over the JSON lists and key value pairs.
Add a header row with columns for the various fields of data. Reference your Nice JSON file to find the key value pairs.
No “For Loop” is required here just straight data from the JSON
Since its not csv it must be md; so add the appropriate markdown header rows
Then add the data row using markdown pipes for delimiters instead of commas
Close out the If
An example with For Loops might be Interfaces or Neighbors but the rest of the syntax and structure is the same
Now because there are multiple interfaces I need to loop or iterate over each interface.
Now add the row of data
Note you can include “In-line” If statements to check if a variable is defined. Some interfaces might not have a Description for example. Test if it is defined first, and if not (else) use a default of “No Description”
Other fields are imperative and do not need to be tested.
Close the Loop
Now do the markdown headers for Interfaces
Then the For Loop again and data row again but using pipes
Then close out the If statement
Complete the remaining templates. Save everything and Git commit / push up to your repo.
Cooking Time
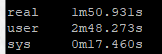
Lets run the playbook against two fully-loaded production Nexus 7000s using the Linux time command
Two minutes in the oven !
Results
Some samples of the output.
First the Nice JSON – note the lists have been collapsed to be brief but any of the lists can be expanded in VS Code for the details
Interfaces
Neighbors
Now some prefer YAML to JSON so we have the exact same data but in YAML format as well
Now the above is already incredible but I wouldn’t call JSON and YAML files “business-ready” – for that we need a spreadsheet!
The real tasty stuff are the CSV files!
The general facts
Interfaces
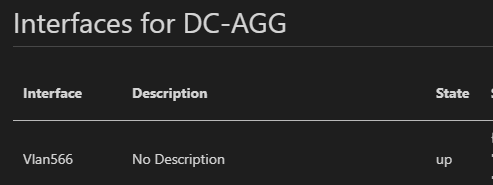
Note that you can filter these csv files directly in VS Code – here I have applied a filter on all interfaces without a description
This captures all types of interfaces
Including SVIs
The Markdown provides a quickly rendered VS Code or browser experience
And the Interactive HTML is pretty neat!
Now remember we have all of these file types for all of the various facts these are just a few samples I like to hand out to the audience – for the full blown experience you can hopefully follow this recipe and cook your own Cisco NXOS Ansible Facts playbook!
Please reach out if you need any additional tips or advice ! I can be reached here or on my social media platforms.
I’ve been on about a three year journey with network automation and while I have had great personal and technical success – my organization and most of those outside my immediate day-to-day circle are still shackled to the ‘old’ way of doing things (primarily the CLI).
This year I decided to start a new program – a training session for those outside of my small development team – primarily targeted at the “operations” staff who can benefit the most from automation and infrastructure as code. This includes network operators, monitoring / NOC team members, IT Security staff, other developers, compute (server / storage) teams; everybody is welcome. We divided the calendar up into different teams with different recurring timeslots.
In advance I had written and tested a bunch of Code for the Campus Core – Ansible Facts and Genie parsed show commands – transforming the output into business-ready documentation. My plan was simple enough:
1. Ensure everybody was on the same page and had the same toolkit * VS Code * Git * Azure DevOps repository bookmarked * Various VS Code extensions * A basic overview of main vs working branches in Git * A basic outline on Ansible, YAML, Jinja2, and JSON
2. An operator would create a working development branch – in our case the Distribution Layer – so dist_facts Git branch. * This operator ‘drives’ the whole session sharing their screen * Step by step, line by line, refactoring (fancy way of saying copy-pasting) working code from the Core and updating it for the Distribution Layer as necessary * Git clone, add, commit, push, and pull performed in both VS Code and Linux CLI * Ansible playbook executed with a –limit against one building, then at scale after validating output * Thorough tour of the JSON, YAML, CSV, MD, and HTML files after each run
3. Work through Ansible Facts and various Genie parsed commands to build up a source of truth
So far it has been a very successful approach with the two teams adopting Marvel superhero teams (TEAM: CAPTAIN AMERICA and TEAM: IRON MAN respectively) allowing me to create memes like this:
Anyway – back to the point – today we had the following exchange:
Me: “So – we just parsed the show etherchannel summary CLI command and transformed the output into CSV files – amazing right! Any questions?”
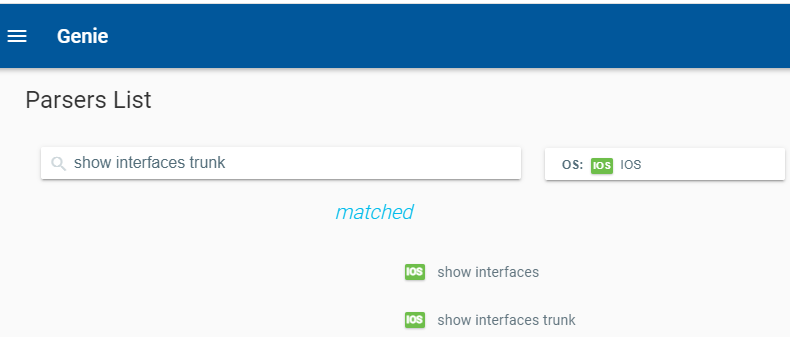
Operator catching on quickly: “We use the show interfaces trunk command often to track down what VLANs are being carried on which interfaces – can we transform that into a CSV?”
Me, excited and proud of the Operator: “Amazing question and I’m glad you brought up a practical example of a command you use in the field all the time we can maybe transform into something a little more useful than CLI output!
Launch the Genie parser search engine (under available parsers on the left menu) and let’s see if there is a parser available
Bingo! Let’s do it!”
The playbook
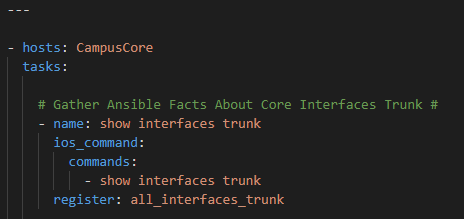
In this example we are targeting the Campus Core.
The playbook is simple enough
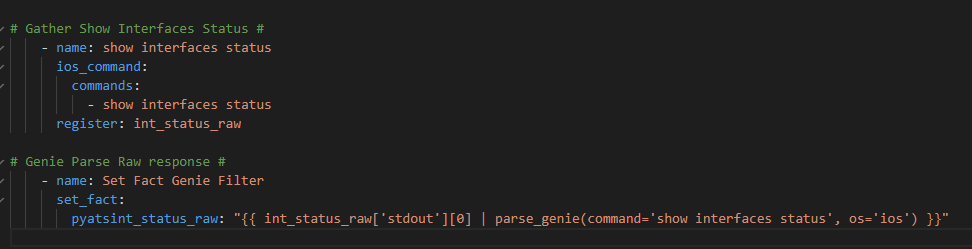
Use the Ansible ios_command module to issue and register the show interfaces trunk command
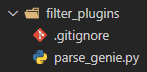
Filter the raw variable and register a new variable with the Genie parsed results
Note you need to pass the parse_genie filter two arguments the command itself and the appropriate Cisco operating system
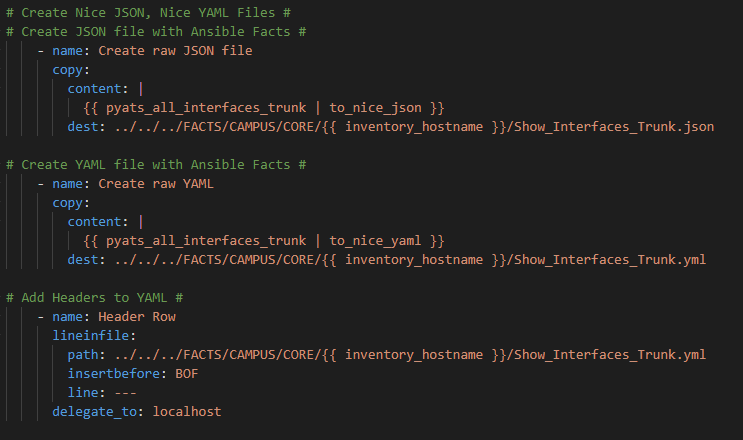
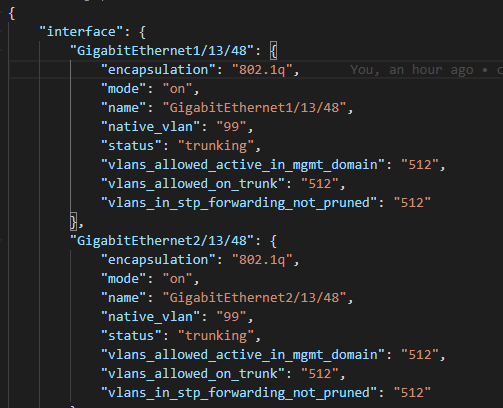
Next I like to create a Nice JSON and Nice YAML file with the parsed results as follows:
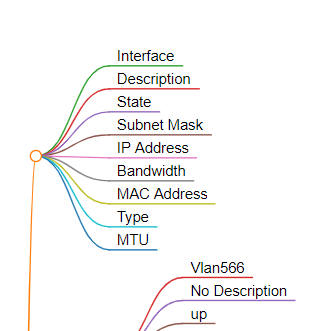
Which look like this:
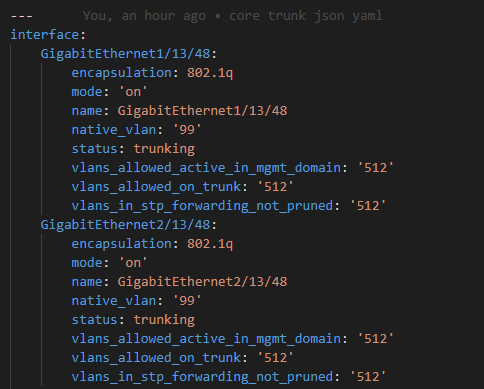
And this:
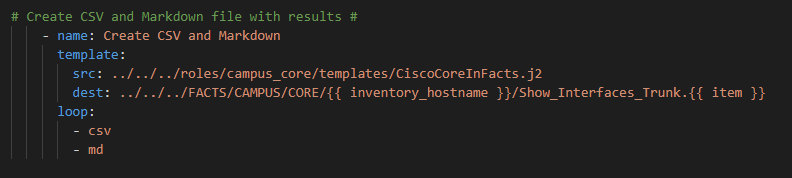
I then use a loop to create a CSV and MD file from a Jinja2 template
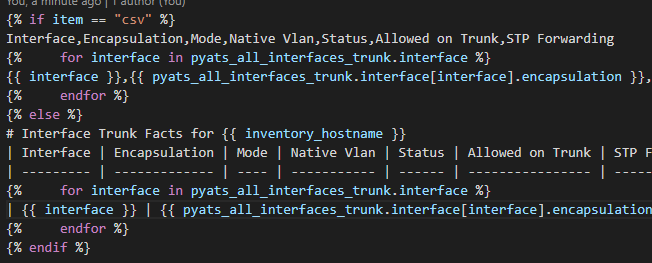
The Jinja2 Template looks like this
Couple things to hightlight:
* We challenge the current iteration of the Ansible loop and when it is on “csv” we template a CSV file format otherwise (else) it will be “md” and we template a markdown file * The For Loop is over each interface in the results * Be careful with the CSV file you need to regex_replace the comma out of results because they are comma-separated which will throw off your CSV file. The markdown does not require any regex.
Which results in this amazing sortable, searchable, filterable, version controller, source controller, truthful, fact-based CSV file:
Now this example is just the singular logical Core but we will quickly refactor the code next week in our next session together and the operator who wanted this playbook will get a chance to write it ! Then we will have the interface trunk information for the entire campus automatically in spreadsheets!
The moral of this story is to collaborate. Ask your front-line operators how automation can help them. Do they have any frequently used or highly valuable CLI Commands they want transformed into CSV format? Would Ansible facts help them? And then show them how to do it so they can start writing these playbooks for themselves.
In the wake of some very high profile IT security breaches and state sponsored attacks using compromised software today I wrote some infrastructure as code Ansible playbooks to create some business-ready documentation to help us understand our Cisco software version footprint against what release the vendor recommends. It is very important to run “Safe Harbor” code in the form of the Gold Star release. These releases are as close as it gets to being bug-free, secure, tested, and supported in production environments.
The ‘old-way’ involved getting the Cisco Part ID (PID) or several PIDs and looking up the recommended release on Cisco.com using an ever deepening hierarchy of platforms, operating systems, and PIDs. At scale this is like a day’s worth of work to go gather all of this information and present it in a way the business can understand.
Building on my recent success with the Serial2Info Cisco.com API as well as Ansible Facts I thought this might be another nice use-case for business-centric, non-technical (not routes, IP addresses, mac addresses, etc), extremely important and critical insight.
Use Case
Can I automatically get the PID from a host or group of hosts and provide it to the Cisco.com Software Suggestion API building business-ready reports in CSV and markdown?
Answer: Yes!
The Playbook
Again you are going to need:
* A Linux Host with SSH access to your Cisco IOS devices and HTTPS access to the Cisco.com API * Credentials for the host and for the OAuth2 API * We are not using Genie parsers here so just “base” Ansible will work
Step 1. Setup credential handling
Create a playbook file called CiscoCoreRecommendedReleaseFacts.yml
Again I use prompted methodology here same as the Serial2Info API
Gather the username, enable secret, Cisco.com API ClientID, Client Secret
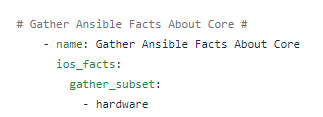
Step 2. Gather Ansible Facts
Using the ios_facts module gather just the hardware subset
Because we are using Ansible Facts we do not need to register anything – the JSON is stored in the Ansible magic variable ansible_facts
I need 2 keys from this JSON – the PID and ideally the current running version. These can be found as follows in the ansible_facts variable:
Which is accessed as ansible_facts.net_model
Which again is accessed as ansible_facts.net_version
With the information above – without going any further – I could already build a nice report about what platforms and running versions there are!
But let’s go a step further and find out what Cisco recommends I should be running!
Step 2. Get your OAuth2 token
First, using the Ansible URI module
We need to get our token using the registered prompted credentials.
The API requires the following headers and body formatting; register the response as a variable (token):
We have to break apart the RAW JSON token to pass it to the ultimate Recommended Release API:
Now we are ready to send PIDs to the API.
Step 3 – Send PID to Cisco.com API
Again using the URI module:
Here we pass the ansible_facts.net_model Fact to the API as an HTTP GET:
The headers and body requirements. Notice the authentication and how we pass the Bearer Token along. We also register the returned JSON:
Here is what the returned JSON looks like:
The highest level key is json or accessed via RecommendedRelease.json
There is a productlist
Which as you can see is a listas denoted by the [ ]
Inside this list is another product key with the values from the API about the product itself
A little further down we find the recommended software release
Step 4 – Transform technical documentation into business ready CSV / MD files
These JSON and YAML (I also use the | to_nice_yaml filter to create a YAML file along with the JSON file) files are create for technical purposes but we can do a bit better making the information more palatable using business formats like CSV and mark down.
It is just a matter of using Jinja2 to template the CSV and Markdown files from the structured JSON variables / key-value pairs.
Add a final task in the Ansible playbook that will loop over the CSV and MD file types using the template module to source a new .j2 file – CiscoCoreRecommendedReleaseFacts.j2 – where our logic will go to generate our artifacts.
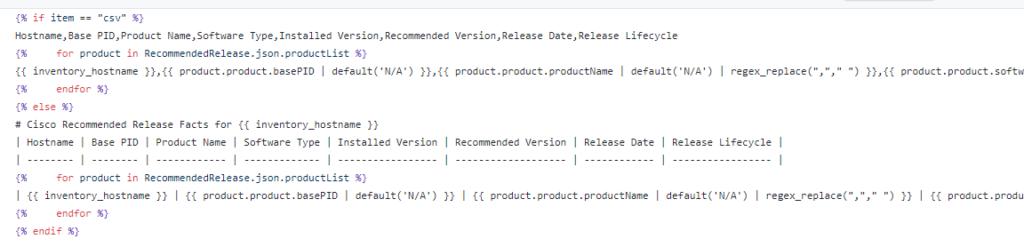
The Jinja2 starts with an If Else EndIf statement that checks if the Ansible loop is on CSV or not. If it is it uses the CSV section of templated file format otherwise it uses markdown syntax.
First we want to add a CSV header row
Then we need a For Loop to loop over each product in the productList
Now we add our “data line” per product in the loop using the various keys
Hostname for example uses the Ansible magic variable inventory_hostname
Then we want the Base PID. We use the Ansible default filter to set a default value in case the variable happens to be empty.
We continue accessing our keys and then we close the loop.
Now we need to create the Markdown syntax
And the same logic for the “data row” but with pipes instead of commas. Make sure to close off the If statement
Step 5 – Run playbook and check results
We run the playbook as ansible-playbook CiscoCoreRecommendedReleaseFacts.yml
Answer the prompts
Let the playbook run and check the results!
Summary
Again with a few free, simple tools like Ansible and the Cisco.com API we can, at scale gather and report on the current running version and the vendor recommended version quickly and easily and fully automatically!
Now go and start protecting your enterprise network armed with these facts!
I wrote a post about untangling dynamic nested loops in Ansible.
In another recent post about trying to improve Ansible performance I didn’t get very far – but this could be the silver bullet I’ve been looking for to both optimize and make my Fact / Genie parsing playbooks more elegant code but also to bring my run times down so I can bring this from the lab to production.
Jinja2 Templates
One of the reasons why I perked up at Ivan’s generous suggestion is because I am a big fan and heavy user of Jinja2 templates already to generate intended configurations (Cisco IOS, NXOS configurations; JSON files for API POST) and documentation (intended configs in CSV, markdown, and HTML) – but I had just never thought of implementing them to create my documentation from received data!
My old way involved taking the structured JSON and using lineinfile or copy to create my output files. This was slow. Very slow.
Copy method:
Line In File method:
How to refactor this?
So I already have everything I need content wise – a header row and the data rows – I just need to move this into Jinja2 format. As it turns out there are some added benefits beyond just performance that I will highlight.
My quick use case was my CiscoNXOSFacts.yml playbook against 2 7Ks just gathering facts (nxos_facts) and transforming the structured JSON into business documentation.
– Create Nice JSON file from facts – Ansible | to_nice_json filter – Create Nice YAML file from facts – Ansible | to_nice_yaml filter – Create CSV file from facts – Create markdown file from facts – Generate HTML from markdown
So the first refactoring is the actual task from using copy or lineinfile to using template. Template needs a source (a new Jinja2 template file we will create in our next step).
Template also needs a destination. Here is where we can use the programmatic capabilities of Jinaj2 to simplify, optimize, and massively improve performance by setting up a simple loop and create both files. Wait files plural? Yes. My old way involved creating 2 separate files in 2 separate tasks. Now that I am using Jinja I can use variables – one item being “csv” and the other item being “md” – and pass them to the template for processing.
So create a Jinja2 template file called CiscoNXOSFactsTemplate.j2 to create your CSV and Markdown files.
Before I show the template I want to highlight another massive improvement to using Jinja2 – Jinaj2 is able to iterate naturally over dictionaries while my previous method had to pass the structured JSON through the | dict2items Ansible filter (against adding processing time). This simplifies the code quite a bit.
In the template we will test if the loop is on csv or md and create either a csv or md formatted output file.
Else if item is md create the markdown file format
One last and very important comment and benefit of Jinja2 is that I do not need to use Regular Expressions “as much” to clean up the JSON. | dict2items leaves a lot of garbage JSON characters behind which I had to previously use processor intensive RegEx tasks to clean up. Now Jinja2 does this cleanup and conversion from RAW to Nice JSON for me!
Results
I have only tested 1 playbook but I am very excited about this new refactored code !
Again this playbook “only” touches 2 physical devices but I have playbooks that potentially could be gathering facts and generating artifacts for hundreds of devices. But the results are pretty clear particularly the system time
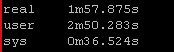
Old way:
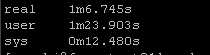
New way:
So roughly half the “real” time but look at the system time – from 36 seconds down a third to 12 seconds! WOW!
Thanks again!
A big thanks to Ivan for taking the time to comment and point me in a better direction. You may not know this but when I started my automation journey one of my resources along with several books, Cisco DevNet, trial and error, was my IPSpace.net subscription. If you are looking for a very affordable and very comprehensive library of networking and automation knowledge this is a good place to start.